

Add a wage component to a profile
When you report the start of employment for an employee, you may want to immediately specify the value of certain fixed wage components, such as the travel expense allowance. You can record this in a profile of the Employment start type. This ensures that when you report the employment start, the wage component immediately gets a value and you do not have to record it afterwards. You can also link a wage component to a profile of the Job change type.
Linking a wage component involves three steps:
- Add a custom field to the profile in the Management tool.
- Link the wage component to the custom field in the properties of the CLA .
- Configure the profile.
For the Job change profile type you can also determine the behaviour. This allows you to determine whether Profit should copy or end the value of the wage component from the old job.
To add a custom field:
- Open Profit.
- Go to: General / Management / Management tool.
- Open the properties of the Profielen In- & OutSite function group.
Profit notifies you that no users are allowed to be logged on to this component.
- Click on: Yes.
- Select Wage component change.
You see the existing fields on the right.
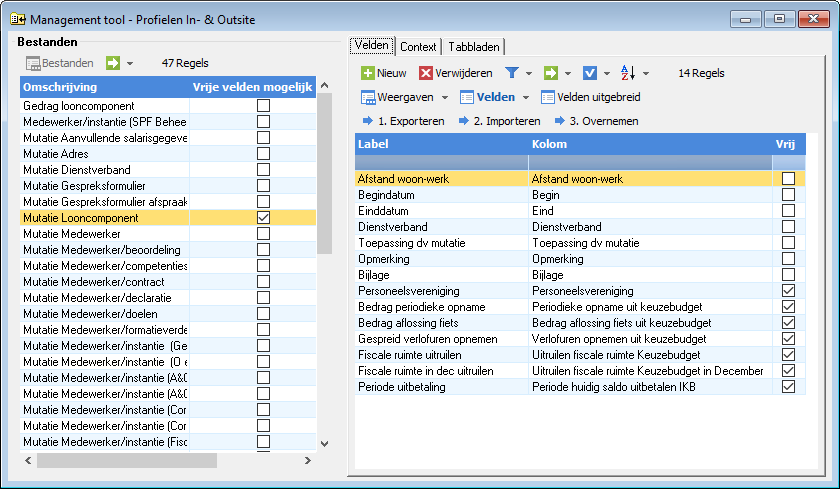
- Click on: New.
- Complete the fields.
- Click on: Finish.
- Click on: Cancel.
- Close the Management tool.
- Click on Yes in the message.
The environment is reopened.
Configure a wage component for a profile
- Go to: HR / Organisation / CLA.
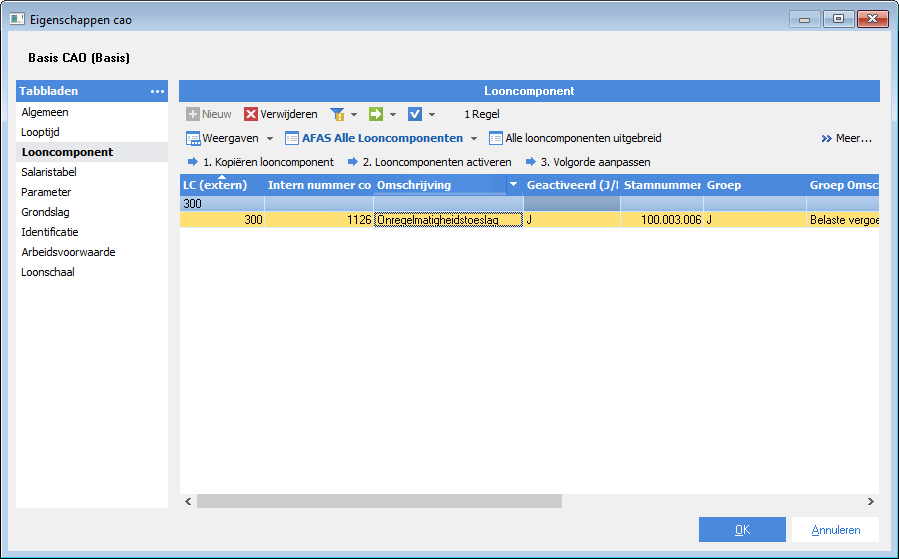
- Open the CLA properties.
- Go to the tab: Wage component.
- Open the properties of the wage component.
- Go to the tab: Parameter.
- Open the parameter's properties.
If the parameter has And construction as the source, you cannot link the parameter in the properties of the wage component. In this case, the value originates from several parameters. You can link these parameters on the Parameter tab in the CLA properties.
- Select the Allow entries for employee check box.
- Select the field under Profile field.
If the calculation method for the parameter is Calculation by employment, Profit enters the value of the Employment field in the properties of the employee in the Employment field when reporting the start of employment of an employee or when creating additional employment in InSite.
- Click on: OK.
You have linked a wage component parameter to a profile field. You can continue to configure the profile field from the profile.
To configure a context:
- Go to: General / In & OutSite / Profile.
- Open the properties of the profile.
- Go to the tab: Context.
- Click on: Maintain for Wage component.
- Click on: New.
- Enter the description.
- Click on: Finish.
In the bottom part of the window, you see the custom fields that are linked to a wage component. If you link this context to a profile, these fields will be available when you use the profile to report the start of an employee's employment in InSite.
Applying a context ensures you deviate from all data. If you do not link context, everything will be displayed.
If you want to ensure that no wage components must be displayed or entered in a profile, create a context and link it to the profile. You set the fields to not visible and not changeable in this case.
- Open the field properties.
- Complete the fields.
- Click on: OK.
- Close the Management tool.
- Select the field settings for Wage component.
- Go to the tab: Wage component behaviour.
You can only access this tab in the Job change profile type.
- Open the wage component line.
- Select the behaviour of the wage component:
- If you want Profit to copy the existing parameter value to the new job line of the employee, select Copy. As a consequence, the parameter value for the employee does not have an end date.
- If you want Profit to end the existing parameter value on the same date as the old job line, select Terminate.
- Click on: OK.