

Add an article dimension
First, you add the new article dimension and next, you add the various values (codes) in the properties.
To add an article dimension:
- Go to: Order Management / Item / Configuration / Article dimension.
- Click on: New.
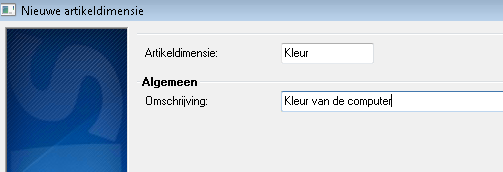
- Enter a short description in Article dimension, for instance, Colour.
- Enter a more elaborate description in Description, for instance, Computer colour.
- Click on: Finish.
You then enter dimension codes in the article dimensions.
- Open the properties of the article dimension you just added.
- Go to the tab: Dimension codes.
- Click on: New.
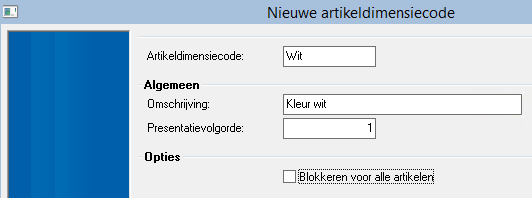
- In Article dimension code, enter an abbreviation or short description for the value, for instance White.
- In Description add, for instance Colour white.
- In Presentation order, enter a number to specify the position in which this field is displayed in the article dimension matrix. The article dimension matrix is the input table that you can use to quickly enter articles with the same item code but different article dimension codes.
- Click on: Finish.
- Add various dimension codes in the same way.