

Edit a document layout
You add fields to the document layout and format them.
|
Contents |
Edit and save a document layout
You open the document layout from Profit in Microsoft Word. In Microsoft Word, you have a separate Profit toolbar.
To edit and save a document in Profit:
- Go to: General / Output / Management / Document.
- Double-click on the document.
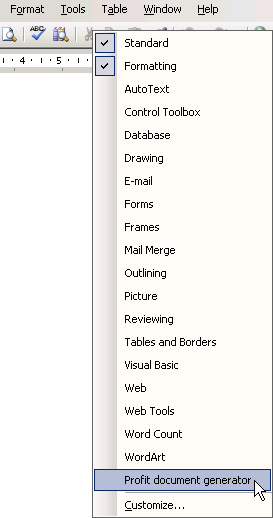
- If the Profit document generator toolbar is not displayed, then you must first activate it:
- Right-click on any toolbar.
- Click on: Profit document generator.
Note:
In Microsoft Word 2007/2010, you do not perform the above step. Instead, you go to the ‘Add-ins’ menu.
- Apply your changes.
- If needed, check the result using the Generate / As document button.
- If you generate letters like this, then Profit will generate one letter for each record present. Of course, if there are many records (such as a large number of employees), then this may take some time. You can speed up the process by completing a filter.
- Click on: Save (in the Profit document generator toolbar).
If the document file size is (too) large, then Profit will notify you of this. Try to reduce the file size by deleting unnecessary elements (such as images and frames). Reduce the file size of images in an external application, not in Microsoft Word itself. You can do this by saving the file in a different resolution or file format. It is also a good idea to adjust the dimensions (length x width) in the external application, not in Microsoft Word.
Add Profit fields to a document
Document layouts are based on data collections. You can include the Profit fields, which are included in the data collections, in the document layout. If a certain field is not present, you have two options:
- You can add the field to the data collection.
- The field is not available in the data collection of the document layout, but it is in fact available in a different data collection. You can add an extra data collection via a subdocument.
By default, the provided document layouts which are suitable for dossier items are based on the following data collections:
- Main data collection, such as Organisations/Persons (excl. Authorisation) (document generator) (in the [Organisation/personal file] Organisation letter (Profit) document layout.
- Dossier
This data collection contains data from dossier items that can appear in the document, such as the creation date of the dossier item.
- Sender
This data collection refers to the sender you specify when generating a letter from a dossier item.You can add extra data collections to a document.
You add fields or subdocuments in the main document. You cannot insert Profit fields into a test box or into the header.
To add a single Profit field to a document:
- In the Word document, move the cursor to the position where you want to add the field.
- Click on Insert field in the Profit document generator toolbar.
- Double-click on the field.
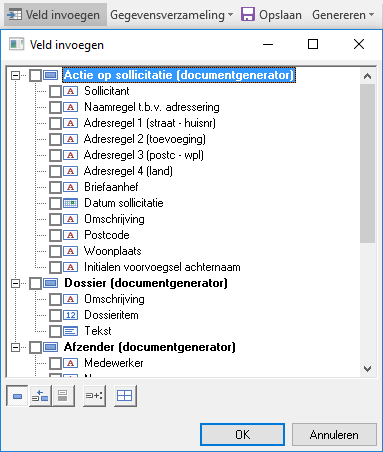
- Profit inserts the field at the cursor position.
You can use the buttons under the field list to insert the field with the default description.
To add multiple Profit fields to a document:
- In the Word document, move the cursor to the position where you want to insert the fields.
- Click on Insert field in the Profit document generator toolbar.
- Select the check boxes.
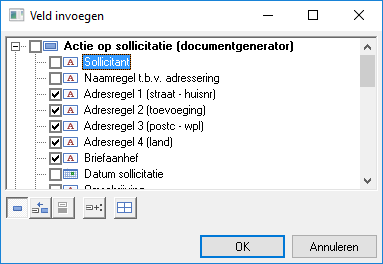
- Click on: OK.
Profit adds the fields one above the other on separate lines.
Add fields with descriptions to a document
Use the buttons under the field list to add fields with descriptions. A separate explanation is provided for working with field descriptions in tables. First activate the desired button(s) and then insert the fields.
Goal |
Button |
Result |
|---|---|---|
Insert fields without description |
|
Profit inserts a field code. |
Insert fields with descriptions |
|
Profit inserts the field descriptions, followed by a tab and the field. If you select multiple check boxes, Profit puts them one above the other on separate lines. If needed, adjust the tab settings of the relevant paragraphs to line the fields up neatly. |
Insert fields with descriptions and colons |
|
Profit inserts the field descriptions, followed by a colon, a tab and the field. If you select multiple check boxes, Profit puts them one above the other on separate lines. If needed, adjust the tab settings of the relevant paragraphs to line the fields up neatly. |
Add fields to a document as a table
Profit can add fields in the form of a table. For this, activate the button: ![]() . You can use this button in combination with other buttons. First activate the desired button(s) and then insert the fields.
. You can use this button in combination with other buttons. First activate the desired button(s) and then insert the fields.
Goal |
Button |
Result |
|---|---|---|
Insert a table with fields without descriptions |
|
Profit inserts a table containing the fields one above the other, each on its own row. |
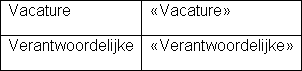
Table of fields (left) and descriptions (right) *) |
|
Example:
|
Table of fields (header row) and descriptions (next row) *) |
|
Example:
|
*) You can combine these options with ![]() in order to place a colon after the field description.
in order to place a colon after the field description.
Also read the Help on tables in subdocuments.
Adjust a page size (height x width)
The Document generator supports documents with an adjusted size in Word. However, these documents can only be printed on printers who support adjusted page sizes in the default way. If you try to print the document on a printer that does not support this in the default way, the default page size is used.
|
Directly to
|