

Add an alert on the basis of a workflow
You add the alert you want to start the workflow.
You can record three texts for alerts that are linked to a date, namely a text that is shown before, during or after an event. Only the text used for during the event is used in the workflow.
To add an alert:
In this example you add an alert when a new member of staff starts employment.
- Go to: General / Management / Alert / Definition.
- Click on: New.
- Select based on a data collection.
- Select data collection Employees (incl. authorisations).
- Click on: Next.
- Enter the description.
- Click on: Next.
- Click on: Modify.
- Add the Employment start date field:
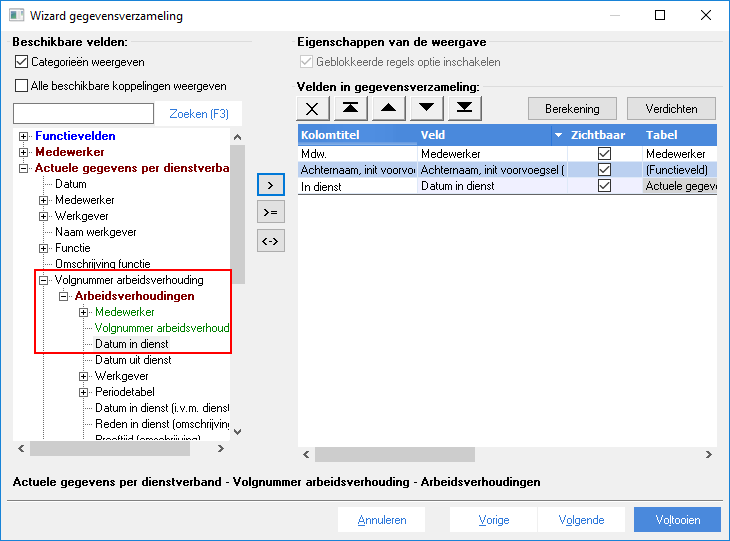
- Click on: Finish.
- To set up an alert progress:
- Select Alert based on date in Alert type.
- Copy the following data:
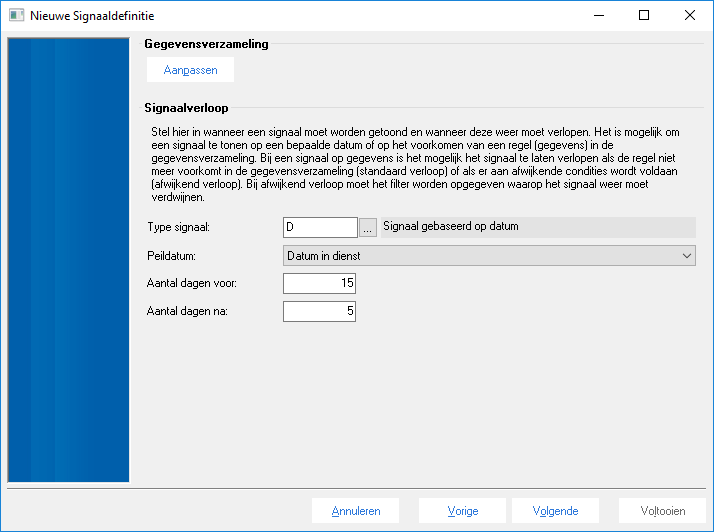
- Click on: Next.
- Specify the Comparison value.
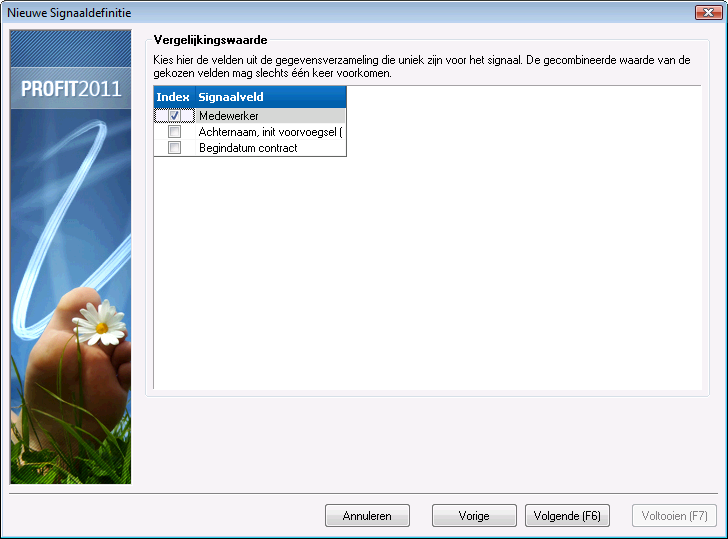
- Click on: Next.
- To enter the alert text:
Only the text used for during the event is used in the workflow.
- Click on: New.
- Select Dutch.
- Click on: Next.
- Enter the alert text.
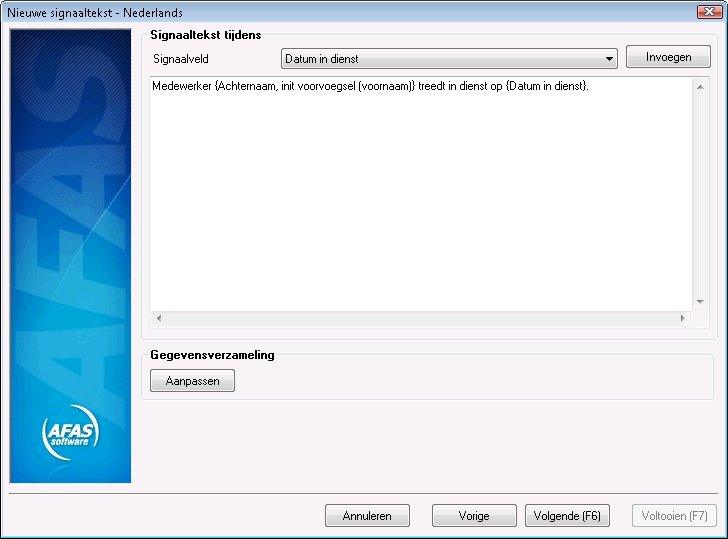
- Click on: Next.
- To specify the destination:
- Click on: New.
- Select Workflow in Destination type.
- Select the dossier item in Dossier item type.
- Click on: Link.
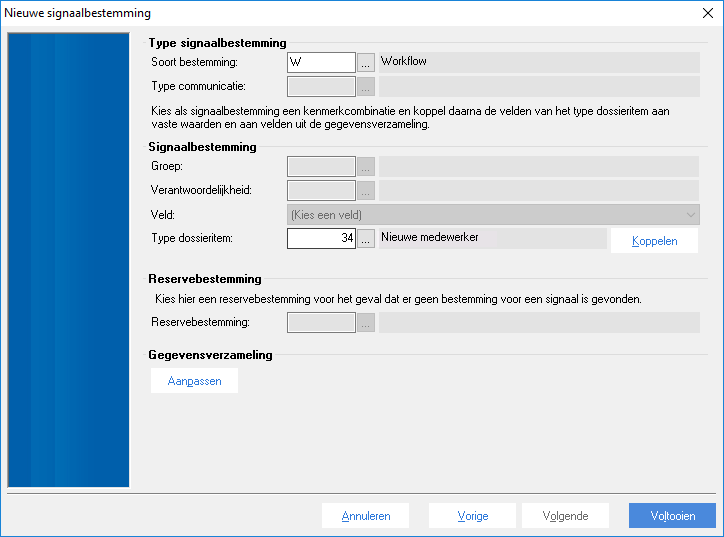
- Select the action that you want to start from the alert.
You now see the fields that are available for the selected dossier item type. This list that you here see may consist, among others, of general fields (Resp. person, Priority etc.) and dossier destinations (Sales contact, Organisation, Person, etc.).
The Description field is not on this list. The alert text that applies to the generated alert is in the dossier item description.
If you want to start the workflow via properties instead of only via the dossier item type, you need to set this up and enable it in the dossier item type.
- Specify the values that need to be used after generating the alert in the dossier item for the workflow.
Note:
If the workflow only starts on the basis of the dossier item type, then you don’t need to set up any fields.
To set a fixed value in a field in the dossier item:
If you start the workflow based on features, then you must specify those features here. You must then add the required features, enable these in the dossier item type and link them in the feature group.
To carry out these steps for all the authorisation groups:
- Open the properties of the feature.
- Select Fixed value in Link type.
- Select the feature value that belongs to the workflow.
- Click on: OK.
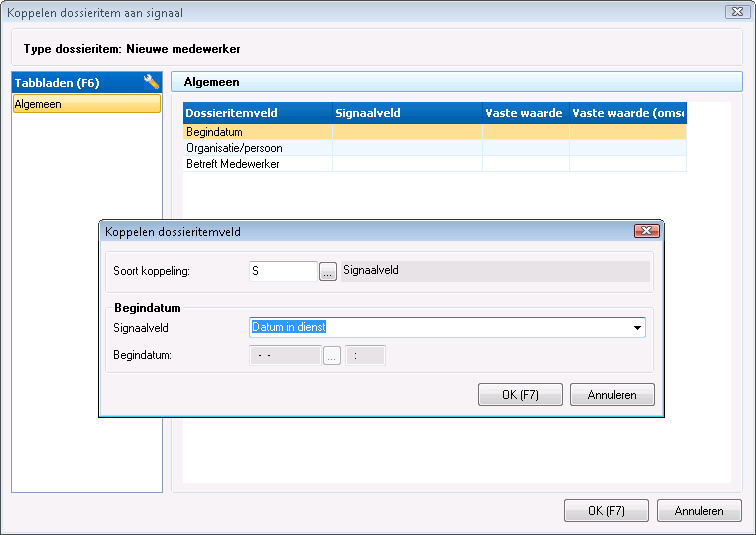
To link an alert field to a field in the dossier item:
If applicable, link an alert field to a field in the dossier item to be added. You can, for instance, use a reference date as the start date in the dossier item and as the date for starting employment. The link gives you all the fields in the data collection for alerts of the same kind.
- Open the field properties.
- Select Alert field in Link type.
- Select the field in Alert field.
- Click on: OK.
|
Directly to
|