

Numbers instead of bars for KIX code
The KIX code should look like a barcode. In some cases, instead of the barcode a series of numbers is displayed. The cause of this problem is that the KIX Barcode font is not known as a font within Windows. You can resolve this as follows.
To check and install the KIX font in Windows:
Note:
If you are using a Terminal Server connection, perform the following steps on the Terminal Server.
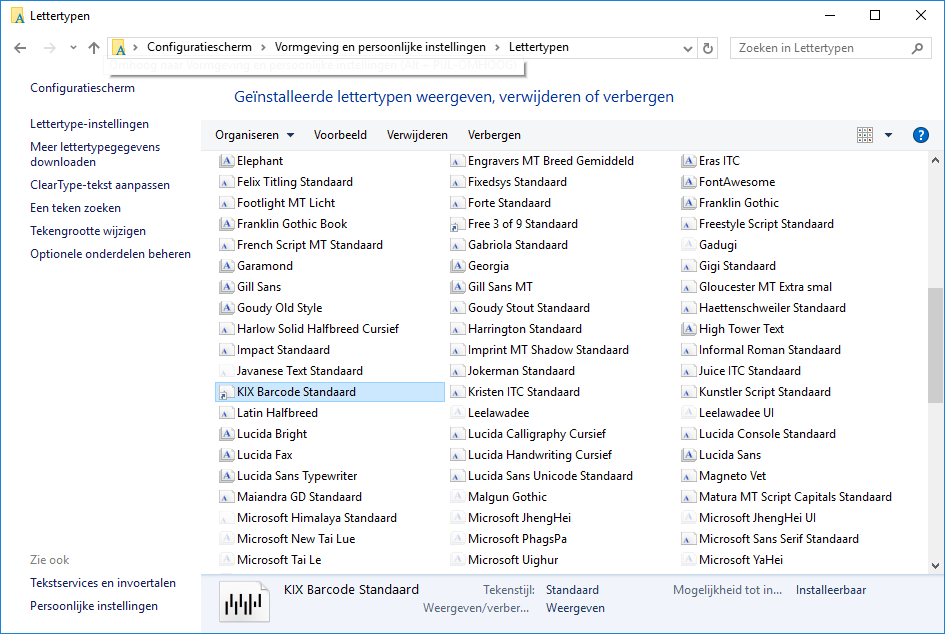
- Go to: Windows: Start / Control Panel / Appearance and Personalization / Fonts.
You see a window showing all fonts installed on the computer.
- Check if the KIX Barcode font is present (installed).
Example: Windows fonts
- If the font is not installed, download it from the TNT website.
- If the font is installed but the bars are still printed as numbers, the field has been set to an incorrect font. Click here to check that and to change the font.
To replace the KIX code font in a report:
If the check shows that the font is installed but the bars are still printed as numbers, you have to set the report field in which the KIX code is used, to the correct font.
- Go to: General / Output / Management / Report.
- Double-click on the relevant report.
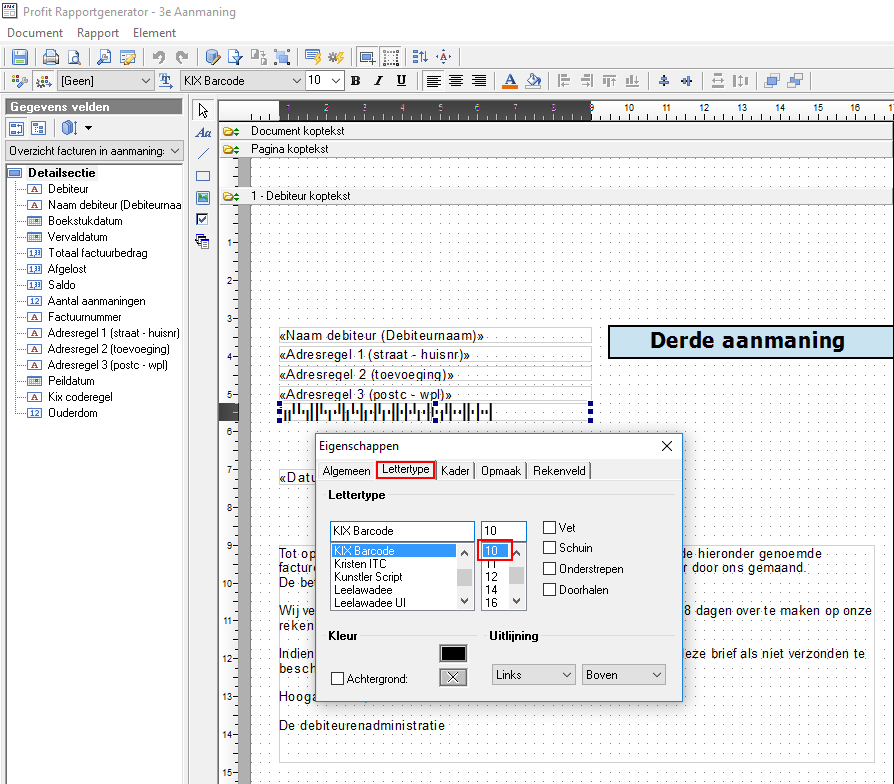
- Right-click on the field with the barcode and select Properties.
- Go to the tab: Font.
- Check the font that is set. Example of a font set for a field:
- Correct the settings as illustrated above.
Note:
The KIX code must ALWAYS be printed in font size 10, or TNT will not be able to process the piece. Even though the font is scalable, it should always be set to font size 10. Also there should be a half empty line before the KIX code.
After checking / correcting the above settings, the KIX code should be printed correctly.
Note:
If the above steps do not resolve the problem, you can perform the steps below:
- Download the Free3of9.zip file here.
- The zip file contains 2 *.ttf files that have to be saved to the Windows font folder.
- Save the files to the Windows font folder on both the client and the server.
|
Contents |
Check and install KIX code in Windows
Note:
If you are using a Terminal Server connection, perform these steps on the Terminal Server.
- Go to: Windows: Start / Control Panel / Appearance and Personalization / Fonts.
A window appears showing all fonts installed on your computer.
- Check if the KIX Barcode font is present (installed).
Example: Windows fonts
- If the font is not installed, download it here from the TNT website.
- If the font is installed but the bars are still printed as numbers, the field has been set to an incorrect font. Click here to check that and to change the font.
Replace the KIX code font in a report
If the check shows that the font is installed but the bars are still printed as numbers, you have to set the report field in which the KIX code is used, to the correct font.
- Go to: General / Output / Management / Report.
- Double-click on the relevant report.
- Right-click on the field with the barcode and select Properties.
- Go to the tab: Font.
- Check the font that is set. Example of a font set for a field:
- Correct the settings as illustrated above.
Note:
The KIX code must ALWAYS be printed in font size 10, or TNT will not be able to process the piece. Even though the font is scalable, it should always be set to font size 10. Also there should be a half empty line before the KIX code.
After checking / correcting the above settings, the KIX code should be printed correctly.
Note:
If the above steps do not resolve the problem, you can perform the steps below:
- Download the Free3of9.zip file here.
- The zip file contains 2 *.ttf files that have to be saved to the Windows font folder.
Save the files to the Windows font folder on both the client and the server..
|
Directly to |