

Create an appointment in Profit Calendar
You add a once-only appointment with a number of invitees.
To create an appointment:
- Go to: General / Calendar / Calendar.
Note:
If you are not authorised for this function, go to General / Calendar / Add appointment. Profit immediately shows the wizard for creating a new appointment. You have to enter the date and time yourself. Then continue with the below procedure.
- Go to: the day and drag the mouse across the time for which you want to add an appointment.
- Right-click in the selected area.
- Click on: New appointment.
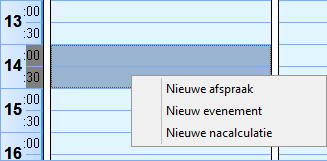
You start the wizard for a new appointment.
- Enter the Subject.
- Select the location or enter it manually in Location different.
- Click on the action: Availability overview locations, at the bottom of the window. This checks the availability of the location.
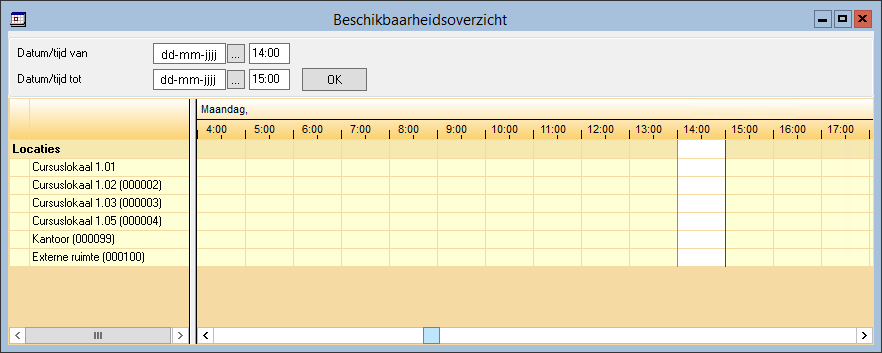
- Use the Esc button to close the window.
- Select the Appointment type.
- Invite the appropriate users (entry lines). The first line shows the organiser/owner of the appointment.
- Specify if you want to invite a contact person or an employee. If you select Contact, this contact is not notified automatically by e-mail. If you select a user, this user must be linked to a person.
- Select the invitee.
You can use the Search invitee action to select other invitees belonging to the organisation.
You can directly create a new contact person for the organisation using the Create a new contact action. Profit launches the New contact wizard. After completing the wizard, Profit automatically enters Person/contact in Line type on the line, instead of User.
- If you have selected a contact person, you can view the properties using the Open contact action.
- Check the availability of employees using the Availability overview invited action. Profit checks the calendar of the invited employees to see if they are available. If necessary, you can adjust the start and end time of the appointment to the availability by moving the green (start time) or red (end time) line. In the availability overview, you see the following images:
 the invitee owns the appointment.
 the invitee does not own the appointment.
 - Select the Owner check box if the invitee is allowed to act as such: the invitee can then change or delete the appointment.
- Specify if the invitee id obliged to participate in the appointment. In Scheduler (not present), the user sees the appointment in the calendar and he can change the Owner setting to be able to change the appointment. This is useful for employees like secretaries.
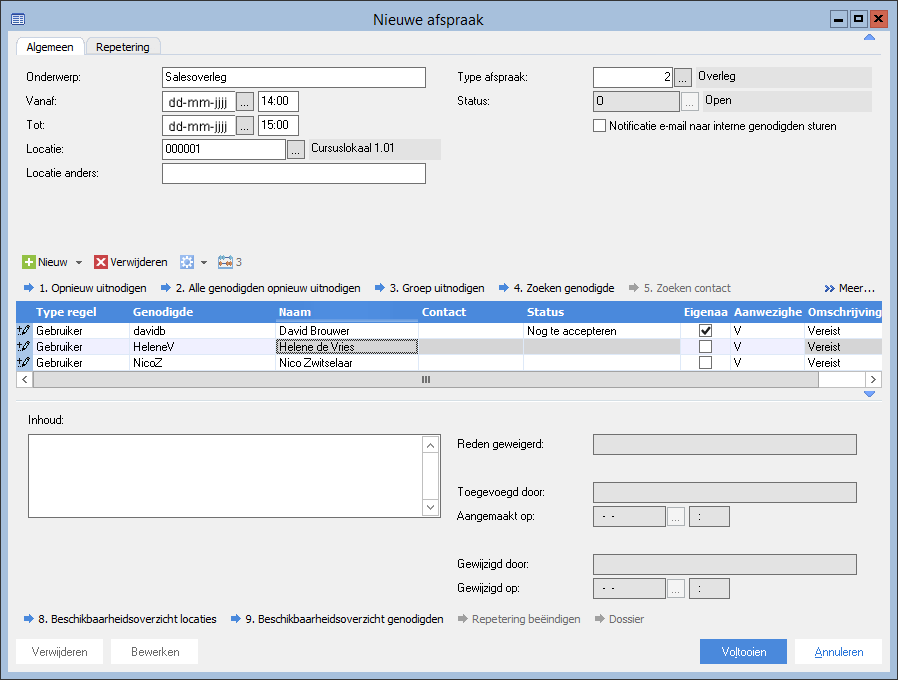
- Specify if you want an e-mail message (notification) to be sent automatically to the invitees.
- Click on: Finish.
The appointment is displayed in Profit Calendar.

|
Directly to
|