

Print labels using the Report generator
You can print labels and envelopes directly from Profit using the Report generator. This is a very useful option, because it allows you to circumvent having to export data to an external package, like Microsoft Word (for a merge document). You can be sure that data from Profit will directly be printed on the labels or envelopes.
A report for labels or envelopes differs from other reports in a number of ways:
- The Document settings have been set for creating labels and envelopes.
- The report only has a Detail section with the exact dimensions of a single label or envelope.
You can add the labels yourself, but you can also use the supplied reports for article labels and labels based on number in the packing slip line.
To add labels:
Setting up and printing labels is explained using an example. In this example we are going to create labels featuring the addresses of the contacts.
- Go to: CRM / Output / Management / Report.
- Click on: New.
- Select based on a data collection.
- Select the Addresses with contacts (current) data collection.
- Click on: Next.
- Enter the description.
- Click on: Finish.
Note:
Before you change the format of the labels, you should clear the Detail section field. Otherwise the format of the fields may cause a conflict with the new format of the label and an error message may appear. This is only applicable if you reduce the size.
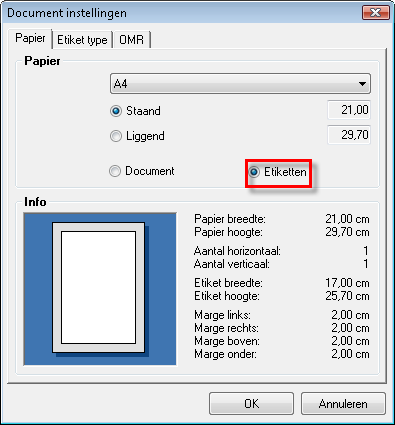
- Go to: Document / Settings.
- Go to the tab: Paper.
- Select the paper size.
- Select the Labels field.
You cannot select this field if there are fields in sections other than the Detail section.
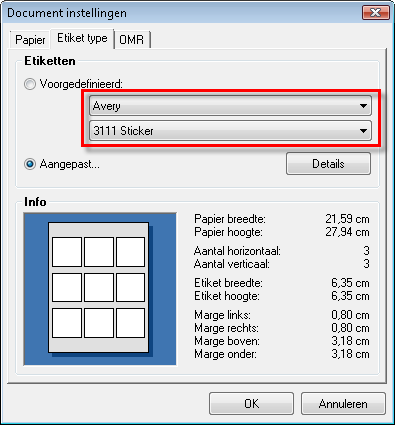
- Go to the tab: Type of label.
- Select the label type.
Note:
If you click in the Brand line, you can also use the arrow keys (up and down) to make a selection. This also applies to Type. This comes in handy, because you will immediately see the brand and type you have selected in the Info field and see what the result looks like.
- Check the data. in the Info box.
- Click on: OK.
- Position the fields you want to print in the detail section.
In this example we put the following fields in the detail section:
- Name
- Address line 1 to Address line 4.
This looks as follows:
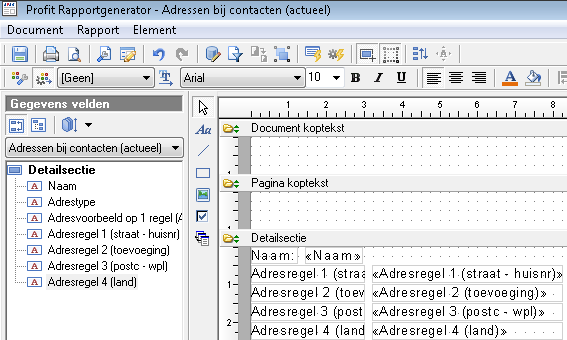
- The report is displayed in the format selected.
To use labels with a deviating size:
If the brand or type of label that you are using is not among the types supplied in Profit, you can specify deviating values for the labels to be used. In this example, the Debtor labels (Profit) report is used for the 'Dymo Label' label size.
- Go to: Financial / Output / Management / Report.
- Click on: New.
- Select based on an existing report.
- Select the Debtor labels (Profit) report.
- Click on: Next.
- Enter the description.
- Click on: Finish.
- Delete the fields from the detail section.
Note:
Before you change the format of the labels, you should clear the Detail section field. Otherwise the format of the fields may cause a conflict with the new format of the label and an error message may appear. This is only applicable if you reduce the size.
- Go to: Document / Settings .
- Go to the tab: Type of label.
- Select Changed ....
- Click on: Details.
- Enter the deviating size.
- Under Page margins set all margins to 0.00.
- Under Label set both Horizontal number and Vertical number to 1.
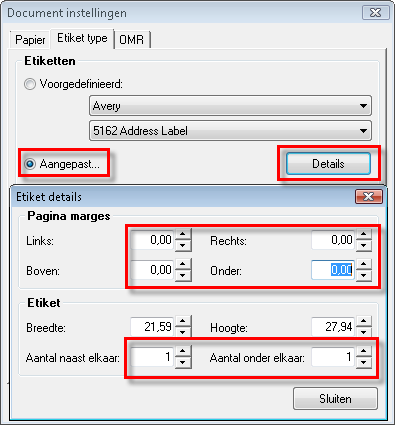
- Click on: Close.
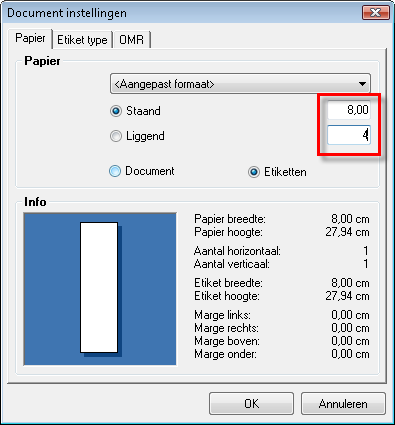
- Go to the tab: Paper.
- Make a choice in the <Customized size> drop-down list.
- Change the paper size to the size of the Dymo Label format.
A frequently used label type is 99014, which is 101 x 54 mm.
Note:
In the Info box, you immediately see the result of the label type you selected or the values you set.
- Click on: OK.
- Drag the fields back to the report.
- You now see the report with the deviating size settings.