

Add an entry
This topic is a general explanation on how to use entry windows. Most entry windows are explained individually in the KnowledgeBase.
To add an entry:
In this example you enter a cash expenditure of €100.00.
- Open the entry layout.
Profit displays the entry layout (the description of the columns to be used and the order in which they are displayed) for adding cash entries.
- Use Tab to go the first entry line or click in the first entry line.
You can use Tab or Enter to move to the next field. Shift+Tab takes you to the previous field.
- Select an account number as follows:
- Click or use the Tab key to go to the Account field.
- Press: F10.
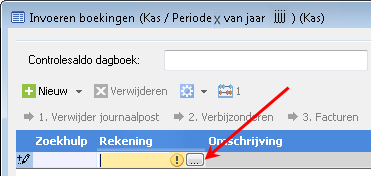
- Use the Up/Down arrow keys to select the 4210 Reparatie en onderhoud gebouw account.
- Press: Enter.
Profit places the account number in the Account field and jumps directly to the Date entry field.
- Click the Date entry field.
- Press: F10.
Profit displays the calendar.
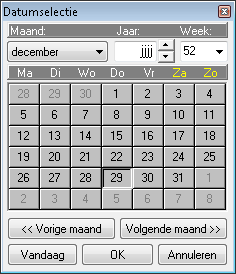
- Click on: a different day.
- Click on: OK.
- Press: F10.
- Complete the remaining fields.
- Press: Enter.
Profit immediately adds the next line because you usually enter multiple lines during one session.
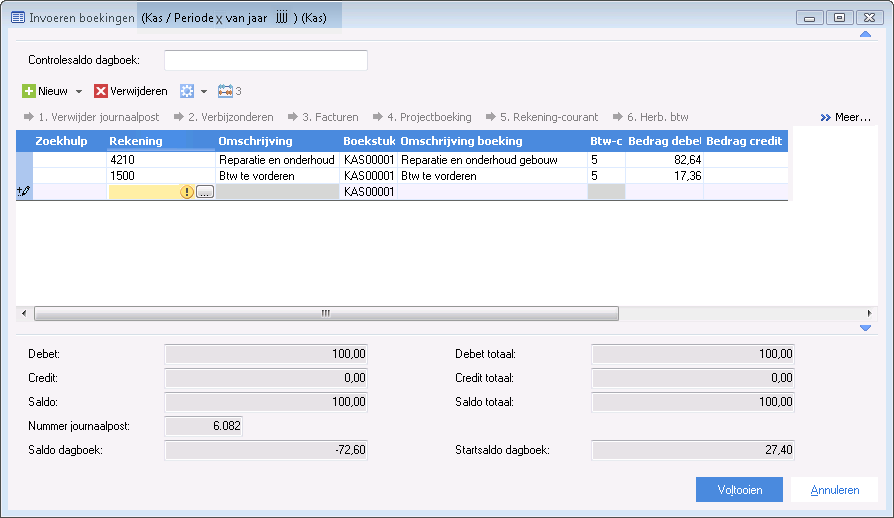
With each entry line there is a symbol to indicate:
 The line has been saved.
 A new line that can still be changed.
 The line you are completing now.
 Saved line you are going to change.
In a memo field, you can start typing directly; the field is opened automatically.
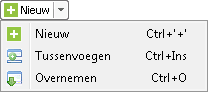
- Use the options under Newto add a line or to copy the values of the previous line. Sometimes one of these choices is not available, depending on the entry layout and the line you are working on.
- Click on: Finish.
Profit saves the entry. If, while making the entry, a new (empty) entry line has been created, Profit will automatically delete it.
- Click on: Yes, if Profit asks if it is allowed to update the entries.
You will be returned to the window with the journals.
- Click on: Cancel.
Many fields in an entry layout have a preferred value that depends on the configuration of the entry layout. You can only modify the preferred value if this is allowed in the configuration.
To change a voucher or invoice number:
You can change the number in the Voucher number or Invoice number fields if a voucher counter or invoice counter is linked to the journal.
- Increase the number: Shift+Arrow Up
- Decrease the number: Shift+Arrow Down
|
Directly to |