

View, add or delete 'Arbo' messages
You can view the 'Arbo' files with the 'Arbo' messages. If errors have been detected, you can review and resolve them in the error log.
In addition, you can manually add and delete messages if the file has not been sent yet.
To view and resolve errors in the 'Arbo' file with messages:
- Go to: HR / Presence and absence / Arbo digital.

You now see the digital files with the messages and the Status column.
To be sent - The file (regardless of the 'Arbo' service) has not yet been created. This is the basic status of a line.
Checked, errors - Errors have been found in the file after you clicked on the Create 'Arbo' message action. Check the errors and resolve them.
Sent - The absence file for the 'Arbo' service has been sent using the corresponding communication profile.
- Click on the Error report action if the status of the line is Checked, errors .
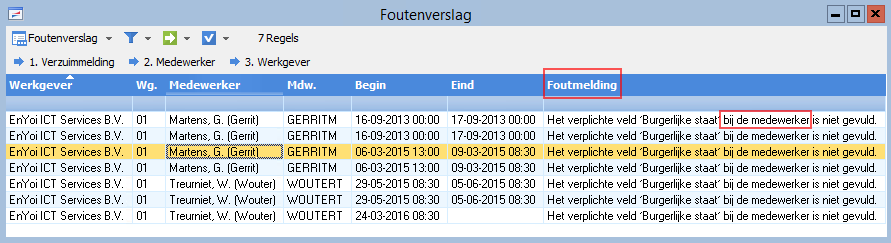
You see the lines for each absence entry per employee. In the Error message column, you see what is wrong and where the error is (in the absence entry, the employee or the employer data).
- Click on the Absence entry, Employee or Employer action to change the data based on what the error message indicates.
- Change the absence entry, the employee or the employer data.
- If necessary, generate the file again.
To view, add or delete 'Arbo' messages:
- Go to HR / Presence and absence / Arbo digital.
- Open the properties of the line.
You now see the employer belonging to the file.
- Open the employer’s properties.
You now see the absence entries in the file.
- Select a line.
- Click on: Delete.
- Click on: Yes.
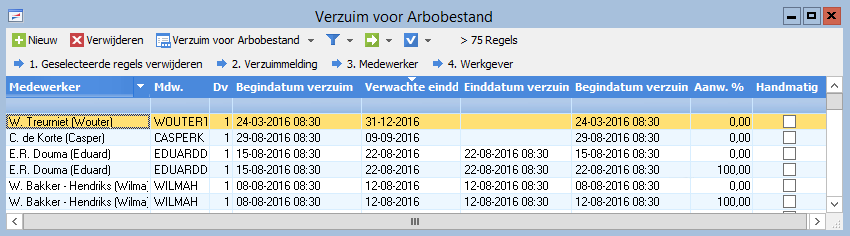
- Click on: New.
Profit shows a view with absence course lines.
- Select the employee.
- Click on: Next.
Profit displays the date of the first day of sickness for informational purposes.
- Click on: Finish.
|
Directly to |