

Add article dimension codes to entry layouts
You keep track of the stock per article dimension by using entry layouts in the purchase and sales processes. Whether you book stock in ad hoc transactions or you register stock via goods receipt, for each line you must be able to select the dimension codes that belong to the article.
For this reason you add the Article dimension code 1 and Article dimension code 2 fields to your own entry layouts that you use for stock purposes. Advanced entry layouts are supplied with Profit and these already include these fields. You can also base your new entry layouts on these advanced layouts.
To add fields to an entry layout:
- Go to: General / Management / Entry layout.
- Select the entry layout. You can also add a new one, for example based on Purchase order (Profit).
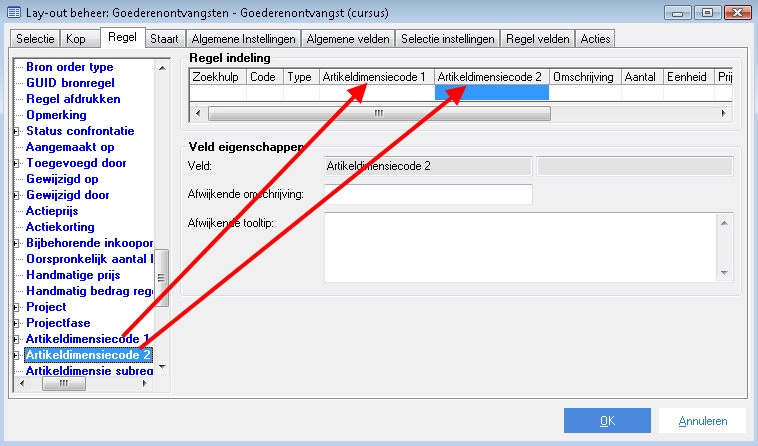
- Add the Article dimension code 1 and Article dimension code 2 fields to the detail line in the entry layout.
Note:
Always add the fields after the (Item) Code field because only after the field with the article code has been filled when entering the line, can the Article dimension field be changed (in as far as article dimensions have been set in the article properties). You may add the field immediately after Item code or further along the line.
- Follow the default procedure for changing entry layouts.
- Repeat this procedure for all entry layouts that you use in the purchase, stock and sales processes. This includes the entry layouts for goods receipt orders, stock write off and entry, order entry, packing slips, etc.