

Divide a portal page into sections
You divide a portal page into sections. Each section can contain content such as banners, images, plug-ins and text blocks. Try to prepare a good sketch of the layout of the page in advance so you know how you need to record the section layout.
The page consists of a number of rows. A row can form one section or be divided into multiple sections. Not every row needs to contain the same number of sections.
Note:
You can only divide a portal page or template page into sections. If you want to place other page type elements next to each other, you can use a banner.
Divide a portal page:
- Open the page.
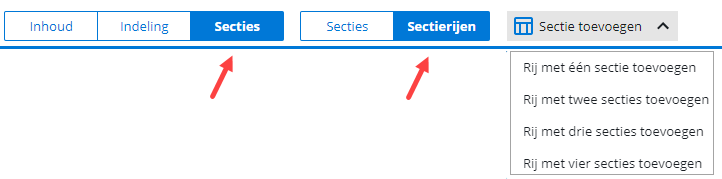
- Click on: Edit (in the Page frame).
- Click on: Sections in the Display frame.
- Click New and add a row with the required number of sections. The row is placed under the selected section. You automatically have one row with one section. This row contains the title of the page.
Change an existing row:
- Click the row with two sections.
- You can delete the section.
- Click the left section of the row.
- Click New to add a section to the left or right.

- Click on Layout.
|
Directly to |