

Filter authorisation based on an organisation chart layer
If managers are present on different tiers in the organisation chart, you can ensure that the organisation chart is guiding both for filling groups and for filter authorisation. Via the following method, Profit places every manager in the right authorisation group based on their position in the organisation chart and applies the correct filter authorisation to employees. The result: Every manager can view the data of the people he manages.
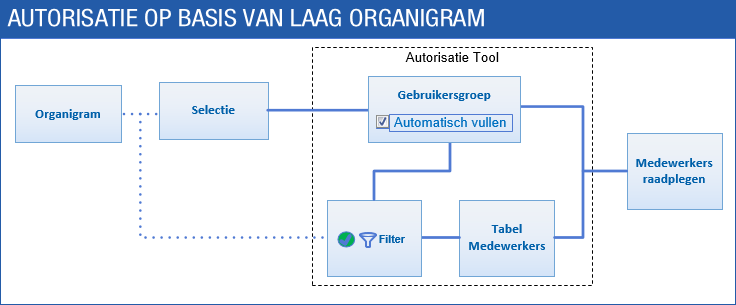
This authorisation method includes the following components:
- Authorisation group for each organisation chart layer
You can add a selection for each management layer and link it to the corresponding authorisation group.
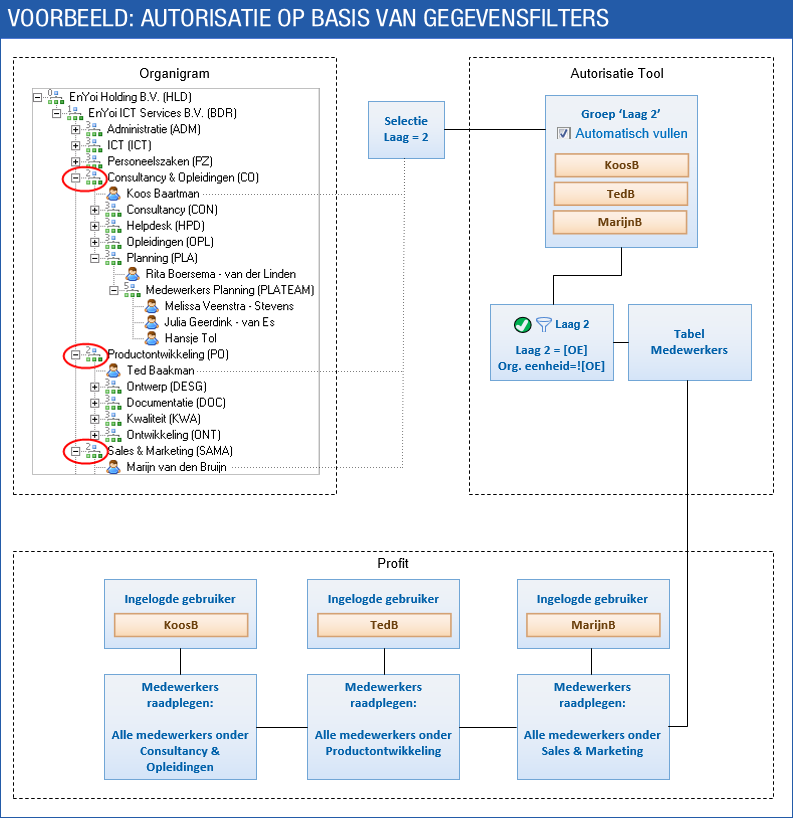
Example:
Your managers are located on layer 2. You can populate the Layer 2 authorisation group with a selection of layer 2; this group contains all managers on layer 2 of the organisation chart.
If you also have managers on layers 3 and 4, you must also add selections for these and link them to the corresponding authorisation groups.
- Filter authorisation based on organisational units.
For each layer you add an authorisation filter based on the [Print] filter tag. The result of this filter tag is the organisational unit code for the manager who is logged on. For this manager his organisational unit is registered in his layer. This also applies to the people he manages. When applying the authorisation filter, Profit shows the manager and the people he manages.
Example:
Koos Baartman is the manager of Consultancy & Opleidingen (CO) and is located on layer 2. This is why Profit has set the value CO for him in layer 2.
Employees who belong to Consultancy & Opleidingen include Rita Boersema (Planning on layer 3) and Melissa Veenstra, Julia Geerdink and Hansje Tol (Medewerkers Planning on layer 5). Profit records all the above layers in the organisation chart for each employee. This means that Profit has also set the value CO on layer 2 for these employees.
The following authorisation filter applies to Koos Baartman: Layer 2 = [Print]
Based on his organisational unit, this becomes: Layer 2 = CO
For Koos Baartman and all the above employees he manages, the value 'CO' is registered on layer 2. As a result Profit shows all these employees when applying the authorisation filter.
It can happen that several managers are set for a single organisational unit. In this situation, they may view all the people they manage, but not each other's data. This is achieved via an extra filter line, excluding the organisational unit of the manager:
Print=![Print]
Example:
Continuation of the previous example. Profit shows employees for which the value 'CO' is registered on layer 2. When Koos Baartman views employees, Profit excludes the employees of the organisational unit ‘CO'.
Koos Baartman van view his own data via the authorisation filter User = [Employee].
Note:
If you are using the 'Multiple simultaneous employments' functionality, the following applies: for an employee with multiple employments, the [OU] tag always yields the organisational unit of the main employment.
Using the 'Employee authorisation based on position allocation' activation, Profit checks the position lines of the employee, regardless of the nature of the employment. This allows you to authorise for both main and sub-employments.
Layer 2 contains the following employees (managers):
- Koos Baartman, Print = CO
- Ted Baakman, Print = PO
- Marijn van den Bruijn, Print = SAMA
The examples are worked out in the following diagram.
|
Contents |
Add a selection
You add a selection for every organisation chart layer that includes managers.
To add a selection:
- Go to: General / Configuration / Selection.
- Click on: New.
- Select User in Selection based on.
Note:
For this use of selections you must always select User. You cannot change this selection afterwards.
- Click on: Next.
As you cannot filter by layer in the existing view, you must add a view.
- To add a view:
- Display the Views toolbar using Ctrl+Shift+K if it is not visible.
- Go to: Views /New view....
- Select Employees.
- Click on: Next.
- Enter the description.
- Click on: Next.
- Select the Show all available links check box.
- Open the Current details per labour relation heading.
- Add the code of the layer to the data collection:
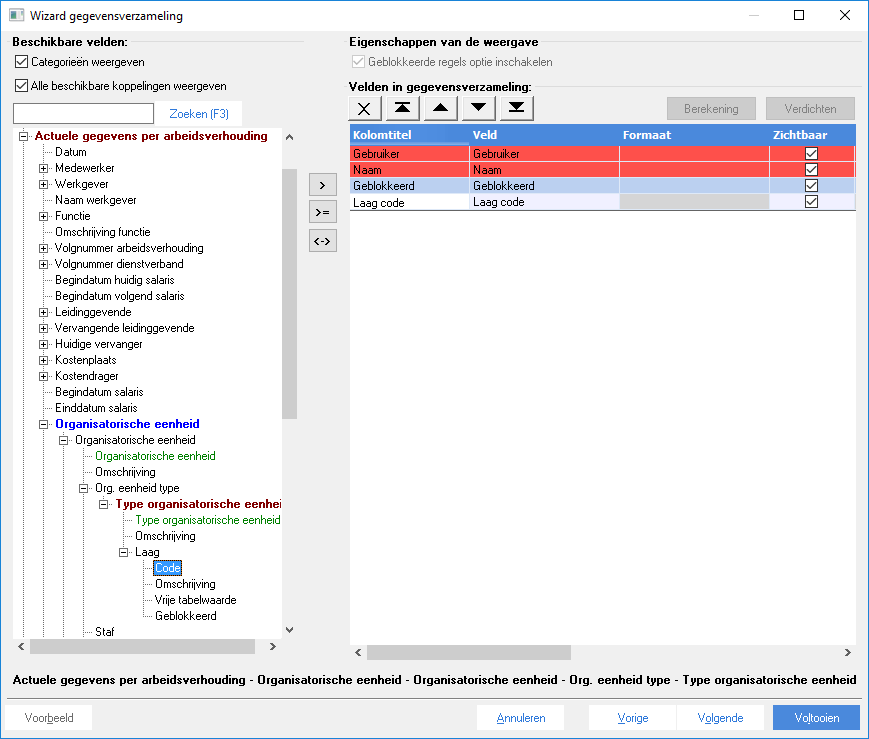
- Complete the wizard.
- Click on: Next.
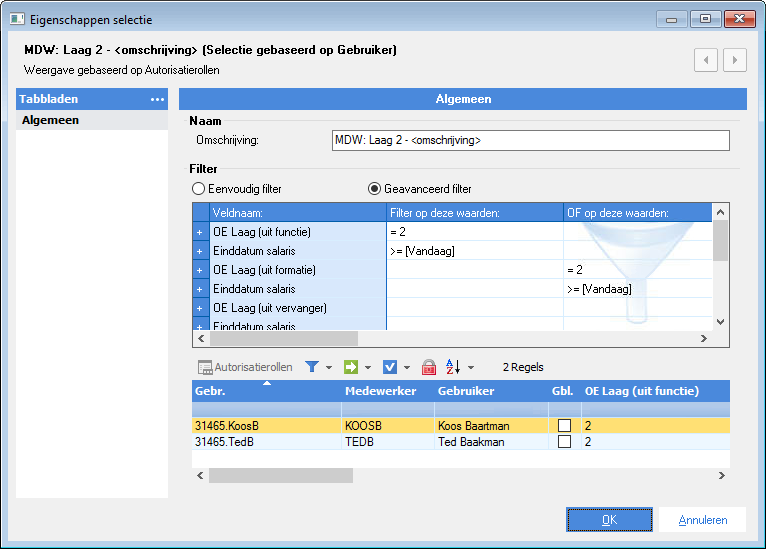
- Enter the description.
- Enter a filter on layer 2 and check the result. All managers on layer 2 meet the filter criteria.
Add authorisation groups based on a layer
You add an authorisation group for each management layer. You specify that Profit should automatically populate the groups based on the corresponding selection.
To add authorisation groups based on a layer:
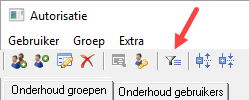
- Go to: General / Management / Authorisation tool.
- Go to: Group / New (or click on
 ).
). - Enter the description.
- Select the Complete automatically check box.
- Link the selection.
- Click on: OK.
- On the Users in group tab, check if the correct users (the managers of the layer in question) are present in the group.
Add an authorisation filter based on a layer
You add an authorisation group for each management layer. Only the underlying layers should meet the filter criteria.
To add an authorisation filter based on a layer:
- Click on: Data filter maintenance.
Profit shows the tables by which you can filter.
- Select HRM - Employees.
- Click on: Add.
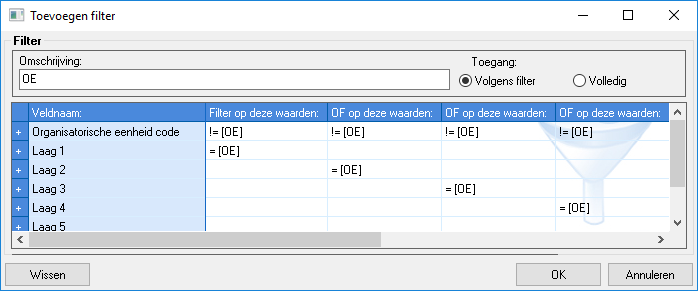
- Add a filter by layer.
- Click on: Refresh. This allows you to test the filter.

- If you click on Refresh, Profit shows an empty result. The user Cursist who is logged on is linked to Cas de Graaf and his organisational unit yields no results in this case.
- Close the filter.
- Activate the filter for the corresponding authorisation group.
- Restart Profit and log on as Cursist.
Universal filter on organisational unit:
You can use the same method to make this filter universal, so that it applies to all employees. You link this filter to the Everybody group.
|
Directly to
|