Configure the occupancy overview and leave in InSite

When adding a leave request, an employee can view an occupancy overview for himself and his colleagues. A similar overview is available for the manager who reviews leave requests. You activate the page type for occupancy overviews and add the overview on the InSite pages for submitting and assessing leave requests.

Contents

  • Activate a page type
  • Add an occupancy overview to InSite pages
  • Authorisation
  • Colours
  • Also see
Activate a page type
  1. Go to: General / In & OutSite / Site.
  2. Open the properties of the site.
  3. Go to the tab: Page types.
  4. Select the Employee occupancy overviews check box.
  5. Click on: OK.
Add an occupancy overview to InSite pages

You have pages in InSite for showing the occupancy overview for managers (MSS) and employees (ESS). You must include these pages as part of a page for submitting or assessing a leave request. These pages cannot be added as independent pages.

The following pages are available:

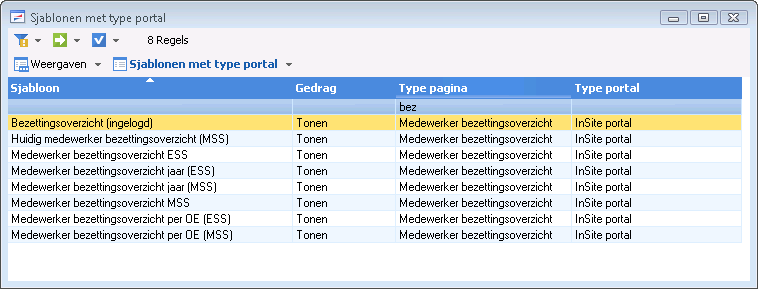
  • Employee occupancy overview in ESS

    This page shows the occupancy of the OU of the employee. The employee can see himself, his substitute, other employees of the same organisational unit, other employees in the same organisation chart layer with the same manager and the management executive.

    You add this page as part of the page for assessing the leave request.

  • Employee occupancy overview (MSS)

    This page shows the occupancy of the OU of the selected employee. You add this page as part of the page for assessing the leave request.

  • Employee occupancy overview for year (ESS)

    This page shows the occupancy of the employee for an entire year. You add this page as part of an ESS page.

  • Employee occupancy overview for year (MSS)

    This page shows the occupancy of the selected employee for an entire year. You add this page as part of an MSS page.

  • Employee occupancy overview per OU (ESS)

    This page shows the occupancy of the selected organisational unit. You select the organisational unit as a fixed parameter.

  • Employee occupancy overview per OU (MSS)

    This page shows the occupancy of the selected organisational unit. You select the organisational unit as a fixed parameter.

  • Employee current occupancy overview (MSS)

    This page shows the occupancy of the selected employee in the current week. You add this page as part of an MSS page.

  • Occupancy overview (logged on)

    This page shows the occupancy in the current week of employees in the same organisational unit as the logged on user. You add this page on a random page.

To add an occupancy overview to InSite pages:

  1. Log on to the InSite site.
  2. Click on: Site management.
  3. Click on: Edit (in the Page frame).
  4. Click on: Layout in the Display frame.
  5. Click on: New / Onderdeel uit bestaande pagina in the Page parts frame.
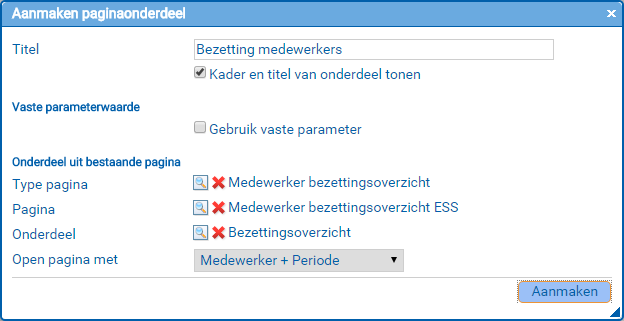
  6. Select the Gebruik vaste parameter if you want to display the occupancy overview for a selected organisational unit.

    If you have selected this, select Organisational unit at Open page with. Next, select the organisational unit for which you want to display the occupancy.

  7. Click on: Publish.
  8. Open the page for reviewing a leave request.
  9. Add an occupancy overview (MSS) in the way described above.
Authorisation

For this part, templates are available. Check the authorisation that is assigned automatically based on templates and check the authorisation for the related InSite pages.

To add an occupancy overview to InSite pages:

  1. Go to:General / In & OutSite / Template.
  2. View the templates.

    See also: Template for functionality

    An InSite page is based on a template. Per template you can specify if related pages must be authorised automatically. This only applies to InSite templates. You cannot change the linked functions with regard to templates that are linked to InSite and OutSite or only to OutSite.

    Note:

    Default templates and functionalities are supplied with Profit. If you use them, new InSite pages are automatically linked to certain functionality and therefore authorised automatically.

    This link only applies to new pages. If you add a new page in InSite, it is automatically linked to the relevant functionalities and, with that, automatically authorised.

    Example:

    Add the EnYoi verlofboeking page in InSite. This page is based on the My leave entry template.

    In the properties of the My leave entry template, the ESS Leave functionality is linked to new pages. This means that the new EnYoi verlofboeking page is automatically linked to the ESS/Leave functionality. Because of this, users with rights to this functionality, will automatically be able to access the EnYoi verlofboeking page.

    Exceptions:

    • This link does not apply to new overviews. A new overview is always based on an existing overview and will also copy the authorisation of the existing overview.
    • This link does not apply to new portal pages that are a copy of an exiting portal page. The link does apply to fully new (blank) portal pages.

    To view templates for functionality:

    1. Go to: Go to: General / In & OutSite / Configuration / Functionality.
    2. Open the properties of the functionality.
    3. Go to the tab: Templates.

      You will see the templates that are linked to the functionality.

    4. Open the properties of a template.
    5. Go to the tab:  New page functionality.

      You will see the functionalities that are automatically linked to a new page, when you add a new page.

    Link functionality to a template

    In this example you make sure that a new overview page with subscriptions is automatically linked to the functionality.

    1. Go to: General / In & OutSite / Template.

      Ins_Sjabloon bij functionaliteit - current

    1. Open the properties of the Subscriptions template (InSite portal).
    1. Open the properties of the template.
    2. Go to the tab: New page functionality.

      The default functionality, Consult subscriptions, cannot be deleted. However, this functionality is not used in the template environments, so by default new pages are not authorised.

    3. Click on: New.
    4. Select the check box for the functionality that you want to be authorised automatically.
    5. Click on: Finish.
    6. Click on: OK.
    1. Go to: InSite.
    2. Click on: Site management.
    3. Click on: Menu in the Site frame.
    4. Click on: New. You do this after Cockpits:.
    5. Enter Contracten in Menu item.
    6. In Action, select Create new overview.
    7. Click on: Next.
    8. Complete the fields.
    9. Click on: Next.
    10. Click on: Add.
    11. Go to: Cockpits / Contracten.
    12. Click on: Publish.
    13. Click on: Yes.
    14. Go to: Profit Windows.
    15. Go to: General / In & OutSite / Configuration / Functionality.
    16. Go to the tab: Pages.

    Hrm_Verlof bezetting InSite inrichten (30 autorisatie)

  3. Go to:General / In & OutSite / Configuration / Functionality.
  4. View the authorisation of InSite pages (filter by Occupancy).

    See also: Functionality.
Colours

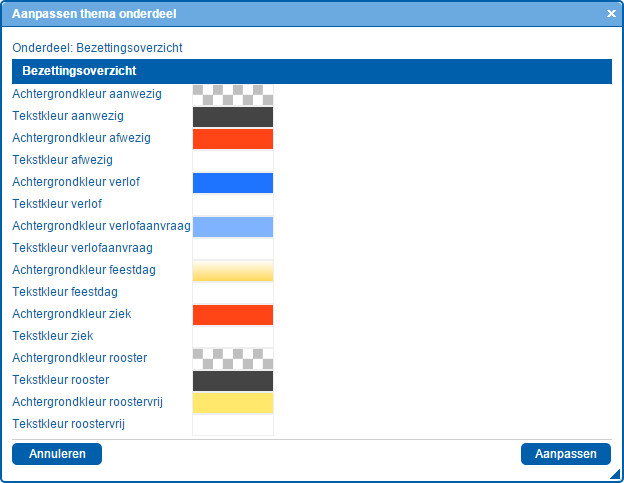
You can maintain the colours of the occupancy overview. You can determine in which colour the leave request, sick days and timetable free days will be displayed.

To set the colours for the occupancy overview:

  1. Log on and start Site management.
    1. Open the site.
    2. Log on with the username and password.
    3. Click on: OK.
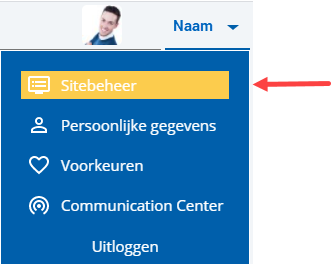
    4. Click on the user name at the top right.

      Ins_Sitebeheer opstarten (10)

    5. Click on: Site management.

  2. Click on: Themes.
  3. Select the theme.
  4. Click on:Other.
  5. Click on:Occupancy overview.

    Hrm_Verlof bezetting InSite inrichten (30 autorisatie)

  6. Change the colours to your liking.

    The colours you can select are part of the theme colours.

  7. Click on: Modify.
  8. Click on: Publish.
Also see
  • Leave entry with occupancy overview

Directly to

  1. Configure leave
  2. Enter in hours:minutes or hundredths
  3. Configure custom tables for leave
  4. Configure the days closed/public holidays table
  5. Record HR settings for leave
  6. Add a leave period table
  7. Configure the statutory and non-statutory leave
  8. Configure a leave type
  9. Configure leave types
  10. WTR on the basis of a work timetable
  11. Extra leave
  12. Pay out or deduct leave
  13. Configure public holiday leave
  14. Journalise the leave entitlement value
  15. Settings per employer
  16. Configure leave and occupancy in InSite