

Workflow Editor
You build and adjust a workflow using the Workflow Editor. This editor makes it simple and easy to create the most advanced workflows.
To view a workflow in the Workflow Editor:
- Go to: CRM / Dossier / Configuration / Dossier item type.
- Open the properties of the dossier item type. .
- Go to the tab: Workflows.
- Open the properties of the workflow. Leave request (InSite).
This opens the Workflow Editor.
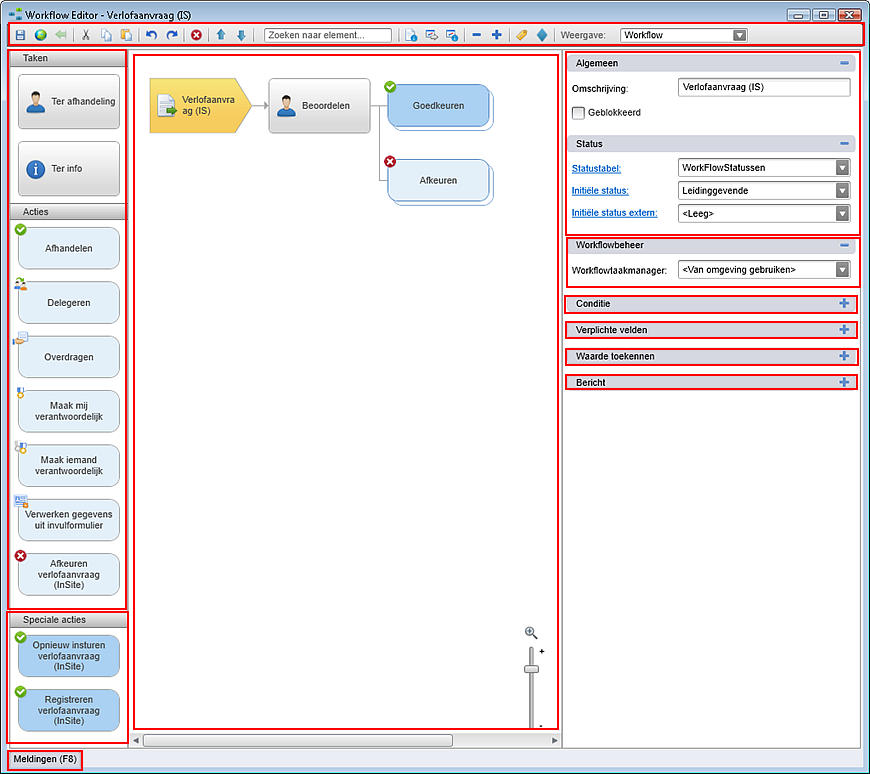
- On the left you can see the elements. A workflow consists of a sequence of tasks and actions that you add very easily using select and drag.
In the next chapters, you are going to add tasks and actions to a workflow.
- In the middle, you see the flowchart of the workflow.
When building or modifying a workflow, you always select a single element that you want to do something with.
- At the right, in the Properties frame, you see the data regarding the status, options and any linked messages of the workflow. You can change this data. For example, you can add icons, place the action in a category and specify if a response is mandatory.
We will discuss the options in the following chapters in this course.
- Select the Review element.
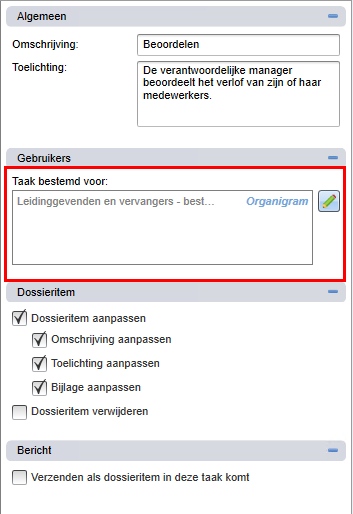
On the right, you see the properties of the selected element. You see that the task is intended for the manager of the sender.
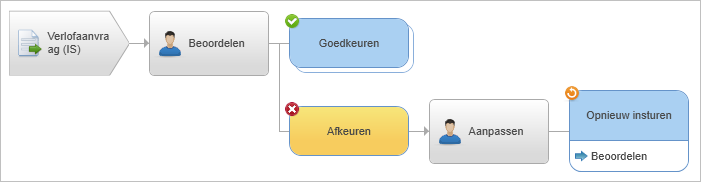
- Expand the Reject element. You can double-click on the element or you can select the element and then click on +. You can also select the element and then open it by pressing * (Shift + 8) The underlying elements are now visible. You now see that the sender has to change and resubmit the leave request after the rejection. The Resubmit task refers back to the Review task.
|
Directly to |