Configure a data-amending workflow

You use a data-amending workflow to register data or change existing data in Profit. Examples of data-amending workflows include requesting leave, reporting an employee's start of employment and changing an employee's address. These are workflows supplied as defaults that allow you to add or change data in Profit.

In addition to the data-amending workflows supplied as defaults, you can also add your own data-amending workflows. You can use the your own workflows by linking these to a profile.

Example:

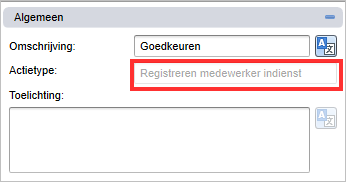
If a manager reports an employee starting work using InSite, the HR department an can assess the request within the current workflow. It is not necessary for the HR department to assess the request for a trainee starting work. So, you would like a separate workflow for this.

You add a new data-amending workflow for reporting trainees starting work. You link this new workflow to the creation profile for reporting trainees starting work.

In a data-amending workflow, extra actions are available:

  •  Resubmit

    You can use this action to resubmit the entry after it has been rejected in the workflow.

When changing and adding a data-amending workflow, there are a number of points for attention to prevent the workflow from coming to a standstill and displaying a message when a workflow task is opened in InSite.

To configure a data-amending workflow:

  1. Go to: CRM / Dossier / Configuration / Dossier item type.
  2. Open the properties of the dossier item type..
  3. Go to the tab: Workflows.
  4. Click on: New.
  5. Enter the description.
  6. Select based on an existing workflow.
  7. Select the existing data-amending workflow.
  8. Click on: Finish.

    Ins_Muterende workflow vastleggen (05)

  9. Add the Reject action to the workflow to be able to reject a task before the entry is registered in Profit.

    In that case, the follow-up task is always Resubmit.

    Ins_Muterende workflow inrichten (20)

    Before registration, the task therefore always goes back to the sender.

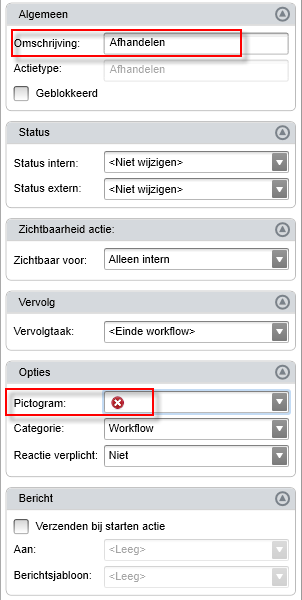
  10. Add the Complete action to the workflow to be able to reject a task after the entry is registered in Profit.

    In doing so, you change the icon for the action. This task must never refer back to a task that comes before processing the entry. You then link a new task to the Complete action.

    Ins_Muterende workflow inrichten (30)

  11. Add the To be dealt with task to the workflow, if you want to use a digital signature in the workflow.
    1. Always add the task after the registration action.
    2. Change the description of the task to 'Bevestigen'.
    3. Select the Employee basic role in Task intended for.
    4. Change the description of the action to 'Akkoord'.
  12. Continue configuring the workflow.

After adding the workflow, you link it to a profile.

Difference between custom workflow and data-amending workflow

Custom workflow

Data-amending workflow

Dossier item types with positive numbering

Dossier item types with negative numbering

Only add something to the dossier

Adjust data in Profit (e.g. SCORFI, leave, absence)

Configure: dossier item type for InSite/OutSite

Configure: activate InSite parts + configure profiles = define contexts + determine which workflow is used for each profile

Custom configuration by dossier in Management tool

Custom configuration:

  • By employee part in Management tool
  • Arrange on tab + activate in context for InSite & OutSite profiles in Management tool

Authorisation of functionality based on roles:

  • Authorise pages: create type, adjust, display & overview
  • Authorise tabs from page parts

    Data filters in Authorisation tool:

  • CRM – Record dossier items: determines whether you can record a dossier item
  • CRM – Dossier items: determines whether you can display a dossier item from the dossier/display a task for it in the My tasks list

Authorisation of functionality based on roles

  • Authorise pages: e.g. Create salary change & Employee/salary choice for salary change
  • Authorise tabs for a page part on an employee page (e.g. Employee salary)

    Data filters in Authorisation tool:

  • CRM – Record dossier items: determines whether you can record a dossier item
  • CRM – Dossier items: determines whether you can display a dossier item from the dossier/display a task for it in the My tasks list

Define conditions in workflow:

  • Data collection of dossier for custom fields and default fields from dossier (e.g. Sender, features, responsible person, etc.)
  • Data collection of destination for information of destination (e.g. Destination = employee -> Data collection = current employee data -> Current job data)

Define conditions in workflow:

  • Data collection of dossier for default fields from dossier (e.g. Sender, responsible person, etc.)
  • Data collection e.g. Current employee data for the current SCORF data
  • Data collection entry for changed data within that part

Tasks:

  • For completion -> This task advances your workflow
  • For info -> This is an informational message to the selected destination

    Default actions:

  • Complete (= including reject, resubmit, approve, etc.); this gives you complete control of the workflow
  • Delegate = ask someone's opinion -> The selected employee receives a task and can only submit a response, but not change anything. After the employee has given a response, the task returns to you.
  • Transfer = forward task to someone else, including the actions you can select (the task is handed over)
  • Make me responsible/Make someone responsible -> The selected value is entered in the special "Responsible person" field, after which the next task can go to the correct responsible person (destination = Responsible person)

    Special actions:

  • Process personal details input form -> If an input form is used, as is the case in OutSite, the data a person/organisation enters can be copied to create a new organisation/person in CRM

Tasks:

  • For completion -> This task advances your workflow
  • For info -> This is an informational message to the selected destination

    Default actions:

  • Complete (=/= reject, resubmit); this allows you to have a task approved to advance the workflow, but nothing is registered in Profit yet; that happens when the special Register action is used
  • Delegate = ask someone's opinion -> The selected employee receives a task and can only submit a response, but not change anything. After the employee has given a response, the task returns to you.
  • Transfer = forward task to someone else, including the actions you can select (the task is handed over)
  • Make me responsible/Make someone responsible -> CANNOT BE USED IN DATA-AMENDING WORKFLOWS

    Special actions:

  • Reject, e.g. leave request in InSite -> Rejects the leave request, meaning it is not registered in Profit
  • Resubmit, e.g. leave request in InSite -> Resubmits the leave request after rejection, so the leave request could still be registered in Profit
  • Register, e.g. leave request in InSite -> Registers the leave request in Profit (meaning employee data are added/changed using this workflow)

    See also:

  • Complete a data-amending workflow

Directly to

  1. Build a workflow
  2. Workflow Editor
  3. Build a new workflow
  4. Example of building a workflow
  5. Change an existing workflow
  6. Configure a data-amending workflow