

Menu and functions
You start a function from the menu. For instance, go to Financial / Debtor / Debtor to add a debtor. You can also start frequently used functions from the history or from a personal shortcut menu.
|
Contents |
Profit menu structure overview
When you start Profit, the menu appears immediately. This menu is called the ‘Start menu’. You click on the function you want to use to start it. Profit also has a menu bar that is organised in the same way as the Start menu. You can use the menu bar to start functions using your keyboard. In order to avoid RSI symptoms as much as possible, it is recommended to use the keyboard whenever possible. In general, this will work faster than operating the mouse.
Below you see an overview of the Start menu:
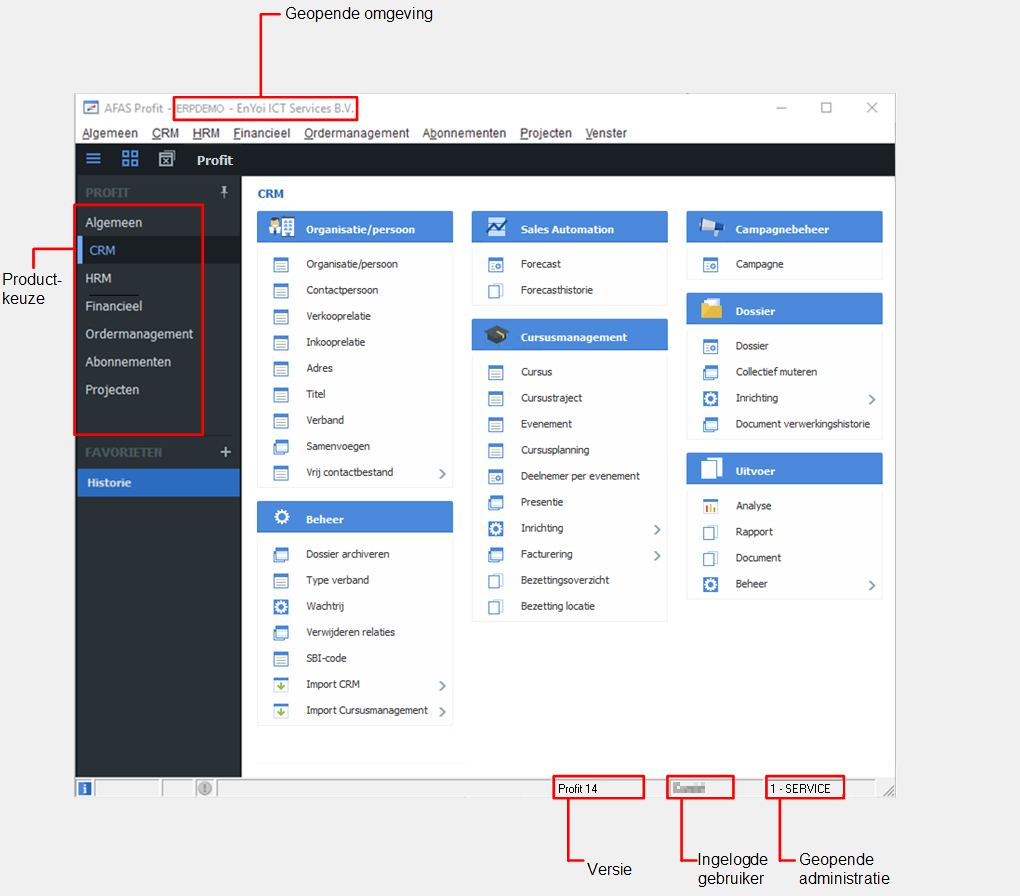
Next to each menu item is a symbol explaining the general functioning of the menu item. The most common symbols are given below:
Symbol |
Explanation |
|
Master data, such as a ledger account or an employee. |
|
Report, analysis or document |
|
Import data |
|
Configuration |
Start functions from the Start menu
The Start menu contains products that in turn contain the available groups and functions. The Start menu always contains the main groups: General and CRM. All other products in the Start menu depend on your licence.

- First click on the product of your choice. Profit shows the Start menu of this product.
Start a function:
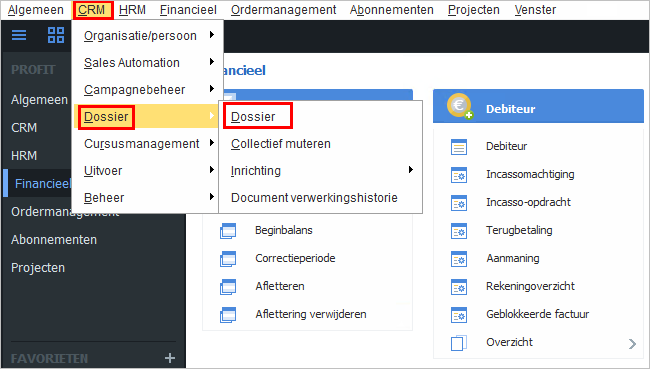
In this example you open the Debtors function of the Financial product.
- Click in the Start menu on the Financial product.
Profit shows the Financial start menu.
- In the Debtor component, click on the Debtor function.
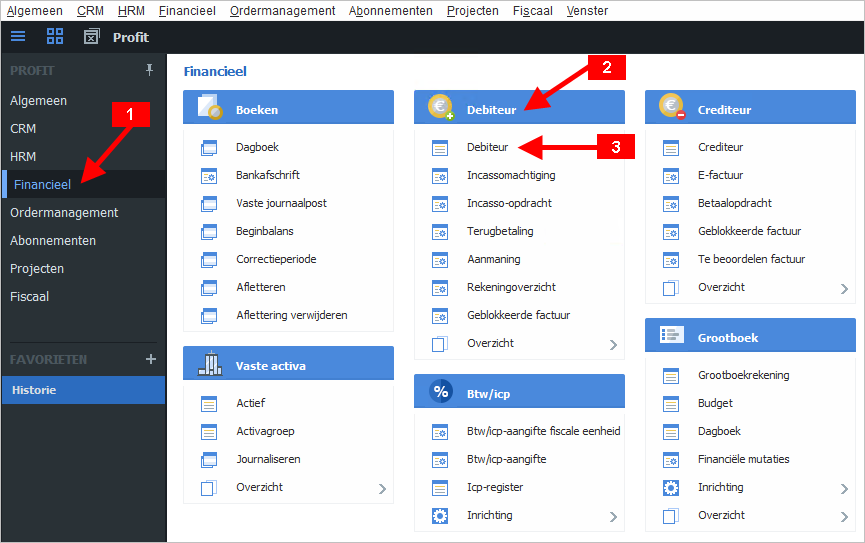
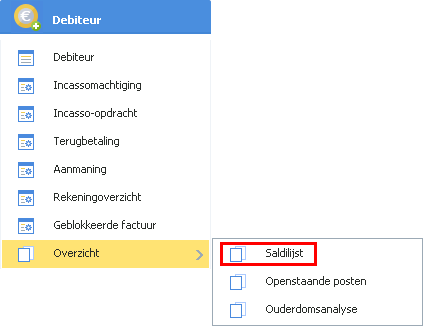
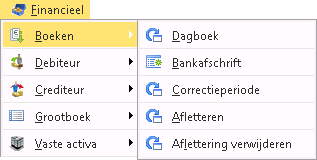
The Start menu of a product may contain what are known as ‘submenus’. You can recognise a submenu by the arrow next to a function:
Access the Start menu with F4
If you have started a function, Profit will usually show this in full-screen mode. This will obscure the menu. If you want to start another function - without closing the current function first - you can access the Start menu as follows:
- In the Start menu, click on the desired main selection, such as Financial or CRM.
- Press F4.
- Click on
 .
.
If you have more than one function open at the same time, you can use various ways to arrange the windows on your screen.
To hide or display a menu:
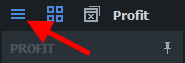
You can hide the Start menu if you do not use it.
- Click on the pin to hide the Start menu.
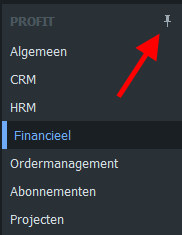
- Move the mouse completely to the left to display the Start menu.
- Click on the pin again to fix the Start menu so that it is always displayed.
Start functions from the menu bar
Another way to open menu functions is from the menu bar in Profit. This menu bar is located at the top of the window and is always available in Profit.
You open functions in the following ways:
- Mouse
- Keyboard
Use the hotkeys, which are the underlined letters in a menu. Open the desired main menu by pressing Alt+hotkey, for example, press Alt+C to open CRM. Then use the arrow keys or the hotkeys to navigate to the desired function.
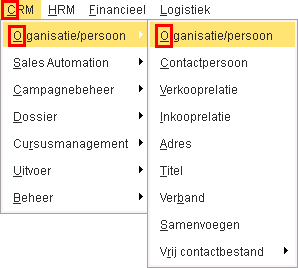
Alternative method: Press and immediately release the Alt key. This activates the menu so that you can navigate to the menu option required.
Favourites menu
The History menu under Favourites contains the most recently selected functions. This menu usually contains the functions that you use most often. Click on the desired function to start it.
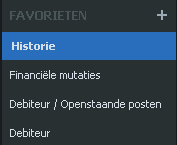
You can empty this (historical) list if it becomes too long. To do this, right-click on History and select Empty.
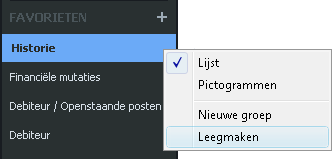
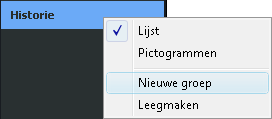
Organise the Shortcut menu into groups
You can organise the Shortcut menu into groups of frequently used functions.
To organise the Shortcut menu and add functions:
- Right-click on History.
- Click on: New group.
- Add a group with Dagelijkse taken as the description.
- Add a group with Wekelijkse taken as the description.
- Open the Financial start menu.
- For the Debtor, Creditor and Journal functions, press and hold the left mouse button and drag the functions to the Dagelijkse taken group.
- Drag the Ledger account, Reconcile and Account statement functions to the Wekelijkse taken group.
- Right-click on History.
- Click on: Large icons.
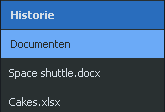
Include links to external files
If you use Profit a lot and every day, it is useful to be able to open important external files from Profit. Such files are for instance important Microsoft Word of Excel files. Include shortcuts to these files in Profit.
To include links to external files:
- Start Microsoft Explorer.
- Open the folder containing the files.
- Drag the files into the group (you can also drag documents from your desktop).
Note:
You can also add a shortcut to a website to a menu.
Add a shortcut to the Windows desktop, for example, to http://kb.afas.nl, and drag it to the Profit pop-up menu.
Licence and authorisation
Which menu items are available, depends on the licence and authorisation:
- Licence
Your licence code is based on the AFAS products that you have purchased or rented or, in the case of Profit Plus, all AFAS products. Components that the licence code does not allow you to access are not visible in the menu. For example, a Profit ERP licence does not include the components of HR/Payroll.
- Authorisation
The authorisation also determines which components you can access. The authorisation has been set by the Profit administrator in your organisation. If you are not authorised for a particular function, this function will not be visible to you in the menu.
The authorisation is always personal, because it is linked to your Profit user name. This is why your menu can look different from a colleague's menu (who has a different user name).
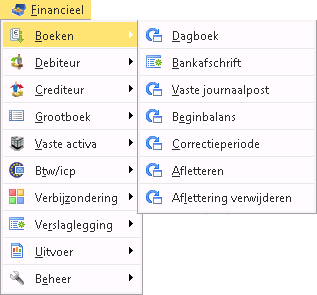
Example:
The Financial menu for a user with extended access rights may appear as follows:
The Financial menu for a user with restricted access rights may appear as follows:
|
Directly to
|