

Configure the purchase invoice entry layout for project dossier
You add the Project and Attachment fields to the entry line of the entry layout for purchase invoices. The Project field is an optional field in which you can enter the project when entering a purchase invoice for a project, so that Profit can submit this attachment as a dossier item to the dossier of the project in question.
To add an entry layout:
- Go to: General / Management / Entry layout.
- Click on: New.
- Click on: the entry layout Financial entries (Purchase journal) (Profit).
- Profit deletes (Profit) and replaces it with a sequence number (1). You can change this description.
Note:
If you use the default Financial entries (Purchase journal) (Profit) entry layout, you cannot change it. In that case add a new entry layout based on this default entry layout.
- Click on: Finish.
- Go to the tab: Line.
- Add the Attachment and Project fields to the entry line, if they are not already present.

- Go to the tab: General settings.
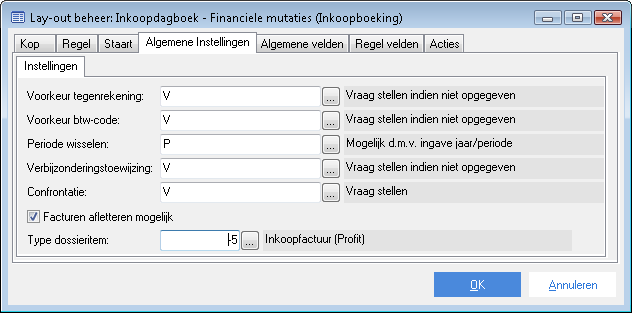
- Manually enter the code -5 for the Purchase invoice (Profit) workflow in Dossier item type.
In Dossier item type, you select which dossier item type (attachment) you want to link when entering the purchase invoice. You can link your own Purchase invoice workflow if you have copied the default Purchase invoice (Profit) workflow.
Note:
The dossier item is only submitted to the project if this is allowed according to the settings of the dossier item type. This means that in the properties of the dossier item type in question, on the Destination Extra tab, the destination for Project must be Mandatory or Optional.
- Click on: OK.
- Link the entry layout to the purchase journal.