

Configure entry layout lines
Determine the layout of the entry lines in the entry lines.
Add fields to a line:
- Go to: General / Management / Entry layout.
- Open the entry layout.
- Go to the tab: Line.
- Select the field in the list.
- Drag the field to the correct position in the Line layout box.
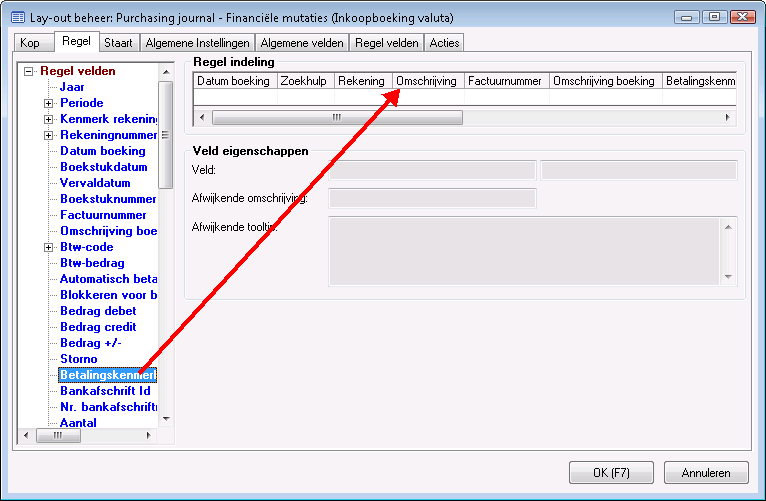
- Double-click on a field in the field list to add it at the end of the entry line.
Delete fields from the entry line:
- Select the field in the line.
- Press: Delete.
Move fields in a line:
- Select the field in the line.
- Use the mouse to drag the field to the correct location.
Record field properties:
- Select the field in the entry line.
- If necessary enter any deviating field description. This is used in the entry layout instead of the default description.
- If necessary enter any deviating tooltip.
You enter a tooltip that applies to the organisation. When posting entries, the user can view the tooltip using F12 (not in AFAS Online).
- You can record additional properties on the Line fields tab.
- Select the field.
- Configure the properties.