

Close a period
As a salary administrator you have to deal with declarations and other entries that come in at the last moment, often after you have already completed the periodic checks. This means that you need to recheck the period.
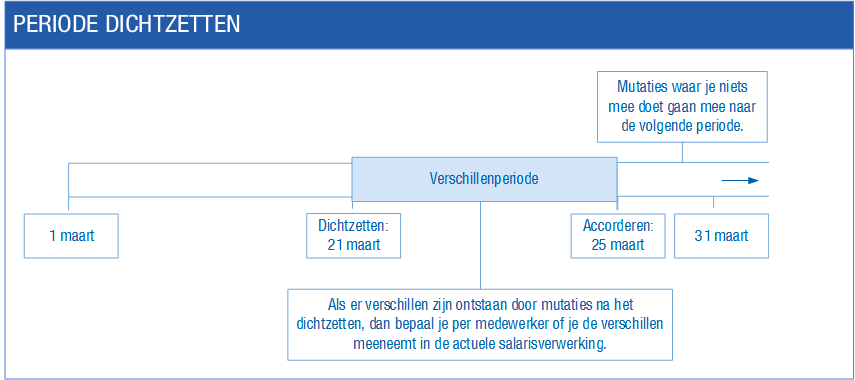
To avoid this, you close a salary processing period. In that case, entries in the closed period are prevented. Using an automatically added difference period, the entries per employee can still be processed in the closed period.
Video
Output
The output you generate for a difference period by using the Output action in the Salary processing cockpit is based on the conditions of an approved period.
To close a period:
- Go to: HR / Payroll / Salary processing cockpit.
- Open the view: Salary processing plan (actual).
- Select the period line. The period line must have the Processed status.
- Click on the action: Close.
- Click on: Yes.
After the task has been processed successfully in the queue, the period is closed and a difference period has been added.

Entries in the closed period are now prevented. From the added difference period you determine whether the entries are included in the closed period.
 More information: views in the salary processing cockpit
To include entries from the difference period in the closed period:
- Open the difference period.
You see the employees for whom an entry has been posted after the period was closed.
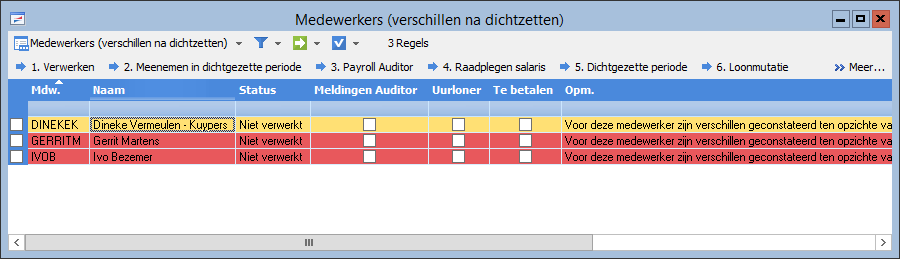
- Click on the action: Process if you want to check the differences.
You process the employee(s) in the queue. When the processing has completed, open the employee to view the five-window pay slip.
If you do not want to include the differences in the closed period, do not select the employee. Do not click on an action, but leave the line as it is. After the approval of the main salary processing plan line, the difference period is deleted. Differences that have not been included, are automatically included in the next period.
- Click on the action: Include in closed period if you want to include the differences.
The employee disappears from the view once the task has been completed in the queue and the view has been refreshed (F5).
- Click on the action: Closed period.
This allows you to view the processing in the closed period.
|
Directly to |