

Activate a custom contact file
If you want to add a custom contact file, you must activate this. Enter the name and determine for which files the custom contact file must be available. Profit uses the name in the menu option 'Start menu / CRM / Organisation/person / Custom contact file / [name]'.
For technical reasons, Profit immediately adds a tab to the Authorisation tool. You must immediately authorise it. Later on you add a tab yourself using the Management tool, if applicable with a different name. This is the tab on which you place the new custom fields. You must also authorise this tab.
Example:
You add the Relatiegeschenken custom contact file for organisations and sales contacts. The general name Relatiegeschenken is used for the function 'Start menu / CRM / Organisation/person / Custom contact file / Relatiegeschenken'.
In the Management tool, add the Relatiegesch. It is shown in the properties of organisations and sales contacts.
To activate a custom contact file:
- Go to: General / Environment / Management / Properties.
- Go to the tab: Custom contact files.
- Double-click on a custom contact file that is not yet in use.
- Select the In use check box.
- Enter the name of the custom contact file.
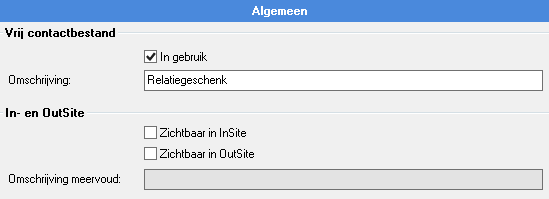
You can use a different name for the tab in the properties of a person or organisation (or a derivative of it).
- Select the Visible in InSite check box under the InSite header if you want to display the custom contact file in InSite.
- Enter a Plural description if you want to display the custom contact file in InSite. Profit uses this description for the name of the page type that you activate for the site.
- Go to the tab: Visible with.
You now see a list of all possible master files.
- Select the desired master files; the custom tab is visible for these master files.
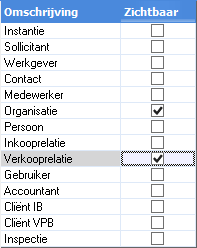
You can only make the custom contact file visible in InSite at the Contact, Employee, Organisation, Person, Purchase contact and Sales contact levels.
- Click on: OK.
If you have made the custom contact file visible in InSite as well, you will see a couple of messages.
- Click on: OK.
Profit shows the new custom contact file under the name you entered.
To authorise a custom contact file:
For technical reasons, Profit immediately adds a tab to the Authorisation tool. You must immediately authorise it. Later on you add a tab yourself using the Management tool, if applicable with a different name. You must also authorise this tab.
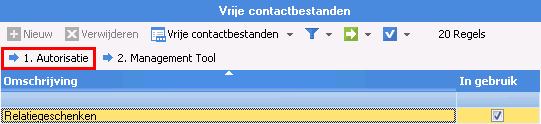
- Select the custom contact file.
- Click on the action: Authorisation.
Now the correct location of the Authorisation tool is shown. The custom contact files on the Authorisation tab are always located under CRM / Organisation/person / Custom contact files.
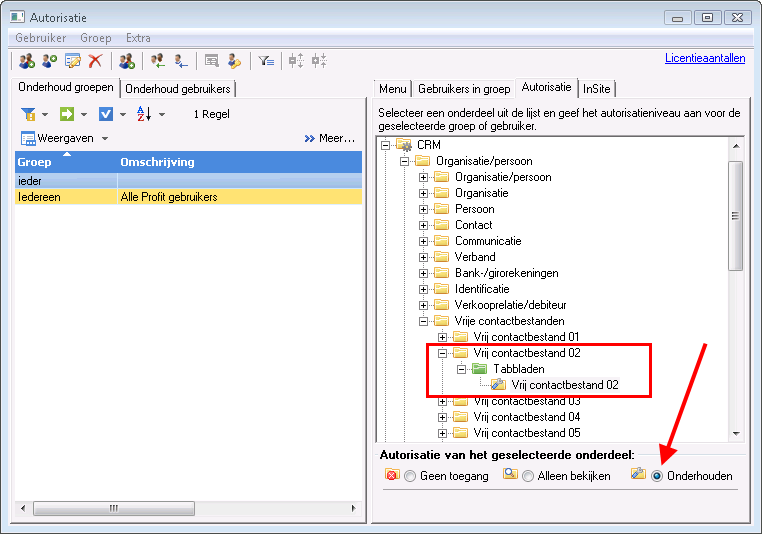
- Go to the tab: Group maintenance.
- Select the group.
- Assign the appropriate right.
- Close the Authorisation tool.