

E-mail/print reports in bulk using the Output wizard
You can use the Output wizard to print and/or e-mail multiple reports (quotations, orders, invoices, etc.) in bulk.
If you also want to use the Output wizard to e-mail the credit invoices, you must have allowed this in the settings.
To e-mail and print reports in bulk using the Output wizard:
- Go to:
- Order Management / Purchase process / Purchase order or to Order Management / Purchase process / Receipt for purchases
- Order Management / Sales process / Sales quotation, to Order Management / Sales process / Verkoopbasisorder, to Order Management / Sales process / Sales order, to Order Management / Sales process / Packing slip or to Order Management / Sales process / Invoice for sales
- Subscriptions / Invoicing / Pro forma invoices or to Subscriptions / Invoicing / Invoices for subscriptions
- Projects / Invoicing / Invoices for projects
- CRM / Course management / Invoicing / Invoices for courses
- Financial / Creditor / Payment order for payment specifications.
- Select the line.
- You can also select multiple lines:
- Click on: Select.
- Select Select lines (Ctrl+S).
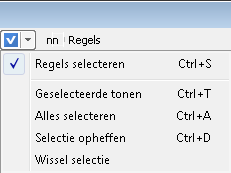
- Select the lines one by one (or press Ctrl+A to select all lines at the same time).
- Click on the action: Output.
- You can indicate that you only want to process the quotations, orders, receipts, packing slips, invoices, etc. that have not been processed yet.
Note:
Normally, a document (such as a quotation) is completely processed when it has been supplied in the manner set as the Preferred issue method for the contact. However, if you process the line via the Output wizard using Different issue, the line will also be marked as Completely processed.
- If applicable, select a different printer and printer tray.
- Select the Different issue check box if you want to e-mail or print all lines in the same way and therefore do not want to take into account the Preferred issue method set for the sales/purchase contacts.
- Select the deviating issue method which will be the same for all selected lines, namely: Print, Print and e-mail PDF or E-mail PDF. For invoices, you also have the E-mail e-invoice + PDF option.
- Select a deviating report (other than that set in the sales and/or purchase contact profile).
- Select a message template if you selected one of the e-mail options as a deviating supply type.
- Select the Save in client record check box if you want to store the issued reports in the dossier for the contact(s).
- For Sorting, select the sorting method for printing.
- Select the Descending check box to sort the reports from high to low.
- Click on: Next. If you are using the queue, this step is not available and you cannot display a print preview.
You now see an overview of the lines that will be issued and how this will be done.
- Select a line with the Print issue method and click on the Print preview action to check the report.
- Select a line with the E-mail issue method and click on the E-mail preview action.
- Close the preview.
- Click on: Finish.
- Click on: OK when the message informing you that the processing is complete is displayed.
The Printed, Dossier, Mailed, Compl. proc. and Provided using eVerbinding check boxes are selected when you have completed the corresponding procedure. These fields are only visible if you have added them to the view.
- If you have printed lines and you are working with the Queue function, then you still need to complete the print task.
Note:
You can only e-mail a report once using the Output wizard. The check box in the Mailed column is then also selected. The line is never e-mailed a second time via the Output wizard; however, a line that has been e-mailed may be shown again because it has another processing method.
You can still e-mail a report manually using the E-mail action (one at a time).
|
Directly to
|