

Configuring AFAS Pocket for each environment
You configure AFAS Pocket per environment and you specify which users are allowed to use AFAS Pocket. You also specify which components of AFAS Pocket you are going to use.
Use this topic to quickly get "up and running" with Pocket. Then set up the remaining sections to get the maximum benefit from Pocket.
Note:
Changes in settings or profiles (in General / Pocket App / Settings) are not immediately visible in active AFAS Pocket sessions. A Pocket user can immediately have the new settings in AFAS Pocket via Settings / Refresh configuration. As administrator you can push this via General / Pocket App / Users, Access tab, action Refresh configuration.
If a user starts an active AFAS Pocket session after a change has been implemented in Profit Windows, it will be immediately displayed in AFAS Pocket.
|
Contents |
Authorise administrator
You authorise the administrator for maintaining the app connector.
Authorise administrator:
- Go to: General / Management / Authorisation tool.
- Go to the tab: Group maintenance.
- Select the user group with the application or process administrators of the Pocket App.
- Go to the tab: Menu.
- Select the check box for the menu options to be authorised:
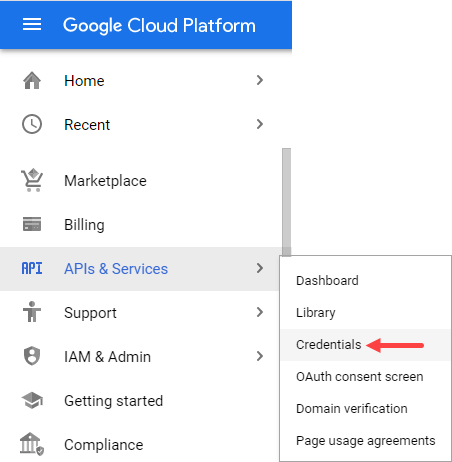
- General / Pocket App / Settings
- General / Pocket App / Users
- Go to the tab: Authorisation.
- Authorise the tabs:
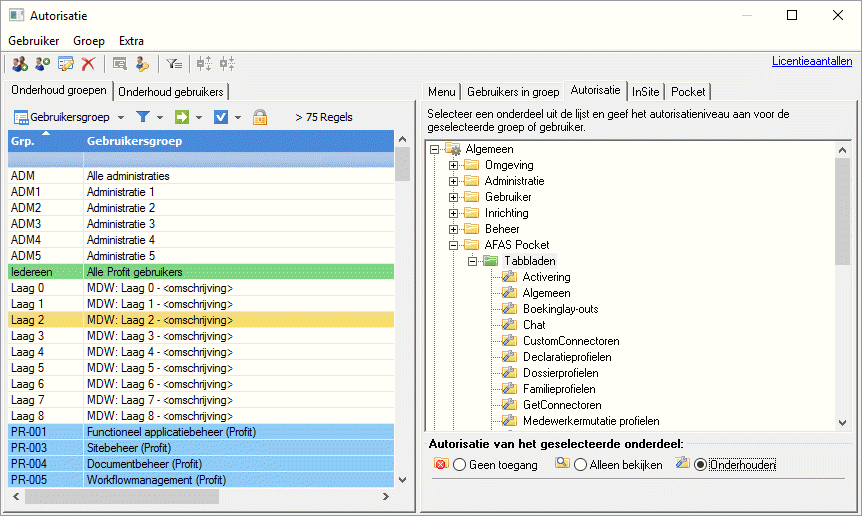
- Close the Authorisation tool. You do not have to reopen the environment.
Authorise users
You add a separate user group for users that are allowed to use AFAS Pocket. Add the users in question to the group.
The app does not have authorisation levels. Users who are members of this group, can use the functionality that you have activated in the AFAS Pocket App. Filter authorisation (for example based on persons or organisations) always applies.
Note:
There is a distinction between users who are linked to an employee with current employment and users who are not linked. If a user is linked to an employee, he can also use ESS functionality, such as consulting pay slips and requesting leave.
For users who are not linked to an employee, only the following items are shown, provided they are activated: My tasks (workflows), Alerts, News, Messages, Contacts, My Profile, Settings.
System users do not have access to AFAS Pocket.
To authorise users:
- Go to: General / Management / Authorisation tool.
- Go to the tab: Group maintenance.
- Select the user group.
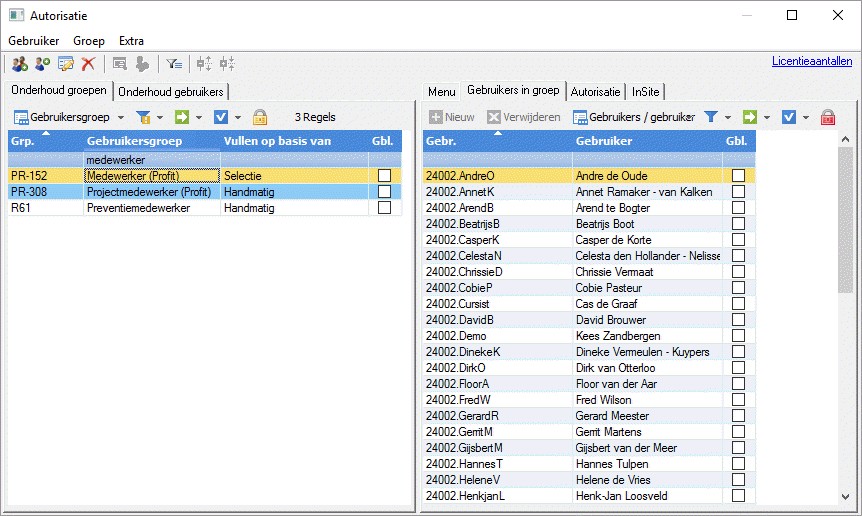
- Go to the tab: Users in group.
- You can see which users are members of the user group. In the example below, the supplied group Employees (Profit) is used, it contains all employees with current employment. You cannot change this. If other users should also have access to Pocket, add a user group yourself and place the appropriate users in this group.
- Check for each user if the properties have been recorded correctly:
- Go to the tab: User maintenance.
- The email address of the user must be entered.

- Go to the tab: Applications.
Enable Profit Windows or InSite. This will enable the Pocket field as well. (you cannot enable the Pocket field seperately).
- Define the authorization per user group (you cannot do this per user, only per user group):
- Go to the User Group tab.
- Select a user group.
- Go to the Pocket tab and authorize the desired items.
- Close the Authorisation tool. You do not have to reopen the environment.
See also:
Filter authorisation:
- The filter authorisation based on organisations/persons and file items also has an effect in AFAS Pocket.
- AFAS Pocket keeps validity combinations into account when entering hours.
- You determine which employees are visible in AFAS Pocket and which fields will be displayed in the Who is Who settings.
See also:
Unblock and configure the Pocket App
You must activate the app in every environment which can be accessed from AFAS Pocket.
It may be the case that settings that are changed in Profit Windows are not immediately implemented in AFAS Pocket. This can, for example, occur if you change the settings of a leave type. Select Settings/Refresh configuration to immediately have available the new settings in AFAS Pocket. This may be useful when testing AFAS Pocket.
To configure the Pocket App:
- Go to: General / Pocket App / Settings.
- Select the user group whose members are allowed to use AFAS Pocket.
Other important settings:
- If employees use AFAS Pocket to enter leave, select the leave type that employees use to enter leave. Always select a composite leave type.
- If employees charge travel expenses, select the cost type the employees use to enter travel expenses.
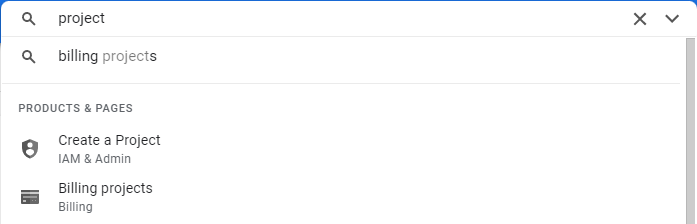
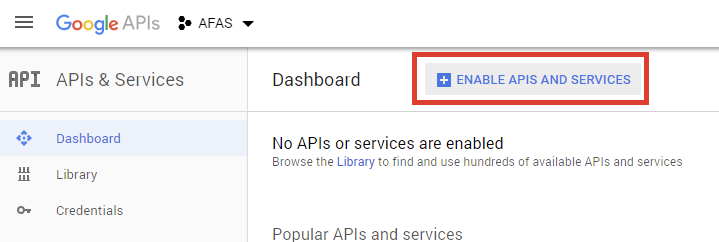
- If you want to use Google location data in AFAS Pocket, create a
 Google Maps API Key.
 - Check the rules for the number of api calls.
- The travelling distance will be determined based on the quickest or shortest route. Determine yourself the calculation method in the app connector. This method applies to all users. The fastest route does not necessarily mean the shortest one! It can therefore be the case that more kilometres are claimed than really driven. If the Fastest route field has been selected, the fastest route will be calculated using Google Maps without traffic pressure. If the Fastest route field has been selected, the shortest route will be calculated based on Google Maps without including traffic levels.
- Enable internal and external descriptions, if you want to show these descriptions during the hour entry.
To activate the Pocket App:
Only carry out these steps if you want to release AFAS Pocket for use by users.
- Go to the tab: General.
- Deselect the Blocked check box.
- Go to the Environment key tab.
- Click on: Generate (after External key). You give this key to the users who are going to use AFAS Pocket.
You can offer a QR code. Download the QR code and offer it to users, for example, by email. The user can read in the QR code by means of AFAS Pocket and does not have to enter the external key manually.
Note:
If you already have an external key and then generate a new external key, the old key becomes obsolete. Your users will no longer be able to use AFAS Pocket. You must first give the new external key to the users and every user has to register again.
Note:
You can clear the environment key of the app in a copied environment without this deleting the environment key of the live environment. This ensures that users can simply continue to work with AFAS Pocket because it will continue to be linked to the live environment. You can generate another environment key for AFAS Pocket in the copied environment.
Record the InSite main site:
Users of the Pocket App can still view documents to be read, add possible responses and approve documents. You must record the InSite main site for this component. Do this as soon as possible because, if not, Pocket App users will see the An already published InSite is not linked to the Pocket app. message
- Go to: General / Environment / Management / Properties.
- Go to the tab: General.
- Select the site in Main InSite site.
Configuring claim profiles
You can use the claim profiles both in InSite and AFAS Pocket. Once you have created the claim profiles, you determine which claim profiles may be used in AFAS Pocket. Your employees use these profiles to submit claims through AFAS Pocket.
You can determine yourself which fields a user must provide a value for in relation to a new claim, which fields require input, etc. by using a claim profile. This will prevent errors from being made and the claim process will run smoothly.
Configuring claim profiles:
- Configure the required claim forms.
- Users must have access to the EES profile choice claim page. If they do not, the Submission profile not authorised message will be displayed
Check the authorisation through General / In & OutSite / Page.
- Go to: General / Pocket App / Settings.
- Go to the Activation tab.
- Select the Declarations check box.
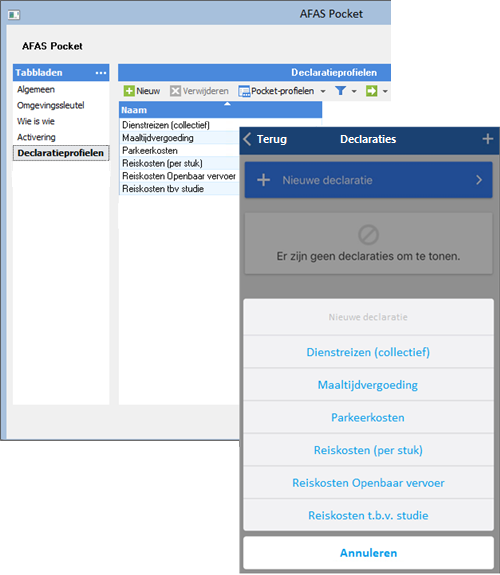
- Go to the Claim profiles tab.
- Click New and select the required profiles. You can only select creation profiles here.
Note:
Pocket users must be authorised for the corresponding creation pages in InSite. You do this by adding these pages to the correct functionality.
After configuration, users can submit claims based on the profiles:
Using claims but without claim profiles:
- Go to: General / Pocket App / Settings.
- Go to the Activation tab.
- Select the Declarations check box.
- If you do not link claim profiles, a user in AFAS Pocket can choose between General costs and Travel expenses when claiming.
Who is Who
You can display the Who is Who component on AFAS Pocket so that users can easily contact colleagues. Three settings are important within this context:
- The Who is Who component is/is not available on AFAS Pocket.
- If the component is available, you determine which fields will be displayed.
- If the component is available, you can determine which employees can be viewed by using a filter.
Conversion to Profit 7:
You can deselect specific Who is Who fields in the Management Tool. This method could be used for both InSite and AFAS Pocket up to Profit 6.
In Profit 7, the settings below apply with regard to AFAS Pocket. The Management Tool no longer applies. During the conversion to Profit 7, a check will be performed to determine whether the Private contact data tab was hidden in the management tool. If it was, the following fields will be deselected in the screen below: the fields of the private address, private telephone number, date of birth, Facebook, LinkedIn, Twitter, the image, private mobile phone number and nationality.
configuring who is who:
- Go to: General / Pocket App / Settings.
- Go to the Activation tab.
- Select Who is who if you want to make this component available on AFAS Pocket. If you do not make this component available (the field has been deselected), you do not have to carry out the steps below.
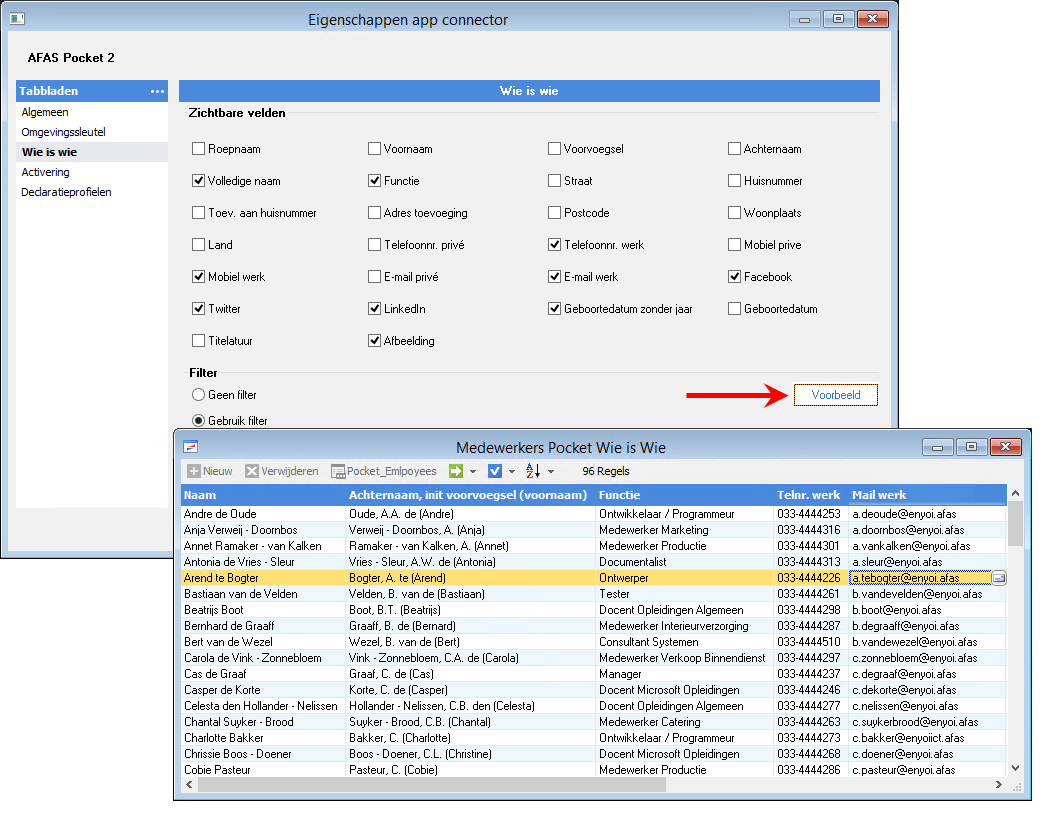
- Go to the Who is who tab.
- Select the fields that you want to show in AFAS Pocket. Keep the privacy policy of your organisation in mind within this context. Also keep in mind that not all field combinations are logical because fields in AFAS Pocket are displayed one after the other using a fixed sequence. Test this as soon as possible in Pocket after you have changed the settings.
To view the name, you can, for example, select the Full name field and deselect the other name fields (nickname, first name, prefix and surname). If you want better control over the view of the name, deselect Full name and select the other required fields.
- Set the filter if a user may only view specific employees in AFAS Pocket.
A fixed filter is always used when retrieving employees. This is integrated into the system and cannot be changed. Employees will only be displayed if they meet the following conditions: the employee is employed at the company, the employee has not been blocked and the employee has the Employed status. If you do not set a filter, the user in AFAS Pocket van view all employees who meet the conditions.
the [employer] filter tag has been used in the example and therefore the employee in AFAS Pocket can only view employees of the employer where he/she also works. He/she will not see employees of other employers.
- Click Example to check the settings. You see a view with the selected fields and the application of the filter.
Refresh Pocket App:
It may be necessary that Pocket App users must refresh their configuration to implement the change in Who is Who.
- Open Pocket App on your smartphone.
- Go to Settings/Refresh configuration.
User language
The user determines in which language he/she will use the app in the AFAS Pocket settings. This only applies in relation to languages supported by AFAS.
When creating a leave entry, the user can select the Leave reason in his/her own language and, when creating an absence entry, the user can select the Absence reason in his/her own language.
Note:
The Absenteeism reason field is no longer available. The user can select the absenteeism type. You do not have to translate this table yourself.
Administrator's actions:
The administrator must add the correct translations in Profit to the custom Leave reason and Absenteeism reason tables.
The Leave type table cannot be translated. It will always be displayed in the base language. AFAS cannot convert this table into a custom table. If you use several languages, you must determine what is the best option with regard to this table.
|
Directly to |