

Automatic project invoice
When you invoice automatically on a 'cost-plus basis', you charge the hours, units, materials, purchase invoices and financial costs entered in the actual costing one-on-one to the client using a sales invoice. If you want to do this, specify that you want to charge the lines when you enter the actual costing.
On these lines, the Charge check box is then selected. You also must have reported the lines as ready for invoicing. Lines that have not been reported ready cannot be included on the invoice.
Automatic invoicing involves a number of steps which allow for a careful check of the amounts to invoice first.
- You first approve the actual costing lines.
- You then report the actual costing lines ready for invoicing. You can do this line by line but also collectively, if applicable after creating a selection (using a filter) in the window with the lines you can report ready. Only lines that have been approved, can be reported ready.
- After reporting them as ready, the lines are prepared for invoicing. Here, once again you can indicate per line which line you want to invoice. You can also do this collectively, perhaps after using a filter selection. Actual costing lines that have been prepared for invoicing, can no longer be changed. This saves the connection between the original entries and the invoices.
- If you choose to first generate draft invoices before you are actually invoicing, you can view these drafts and, if necessary, edit them. You then must release the drafts for invoicing and create the finalised project invoices.
- In the next step, the lines to be invoiced are actually printed on invoices. In this step, once again you can indicate which individual lines you actually want to invoice or select all lines. The invoices are printed using the Profit Report generator based on a custom layout.
- You can collect the invoice lines per relation or per project. This allows you to generate one invoice per relation or one invoice per project. If applicable, you can group the lines for printing and compress them if you do not want all the lines to be printed separately on the invoice.
- You can always reprint invoices. In addition, you can specify whether you want to be able to change generated invoices afterwards.
Note:
The Remote sales VAT duty is not possible in combination with automatic invoicing. This applies to all types of automatic invoicing: in drafts, projects, courses and subscriptions.
To determine which layout is used:
When an invoice is printed, Profit determines the report that is to be used for printing. Which report is used, depends on the level that you set something.
The first report is the one with the highest level. If this has not been entered, Profit uses the report that has been set at the next level, etc., with 1 being the highest level and 4 the lowest. So:
- Report from the invoice header (only applies if you have added the Report field to your entry layout for subscription/project/ draft invoices and if the invoice in question is a manual invoice or a subscription invoice that has been changed).
- Report in the project or subscription properties. (For the project the report is specified on the Report tab and for the subscription in the Dev. invoice layout field on the General tab).
If appropriate for the project, you can use the field settings to make the fields for the report layout mandatory.
- Report that is linked for the subscription invoice, project invoice and draft invoice in the deviating sales contact profile that is linked to the sales contact.
- If no invoice report is selected in the linked deviating sales contact profile, the default sales contact profile (*****) is used. The default profile always applies, even if not a single sales contact profile is linked.
Note:
Only if you are invoicing per project, Profit uses the above hierarchy to determine the report. If you invoice per sales contact, each line may have a different project number, meaning that the report specified in the project properties does not apply.
You cannot delete invoice (lines) originating from automatic invoicing. After automatic invoicing, you can only set the line price to 0 or credit the invoice.
To automatically invoice project invoices:
- Go to: Projects / Invoicing / Invoice automatically.
- Set the quick filter to Administration, if you have multiple administrations and do not want to invoice for all administrations.
- Select the check boxes for the lines to be invoiced.
- Click on the action: Generate.
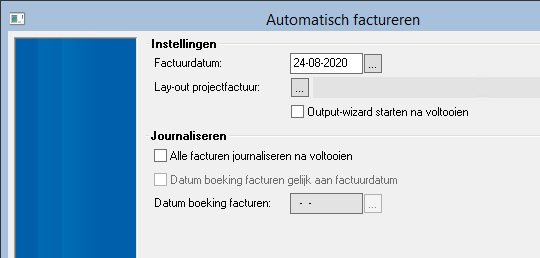
- In Invoice date, select a different date if you want to use another invoice date.
- Select the Start output wizard upon completion check box if you want to e-mail or print the invoices immediately.
Note:
If you choose automatic invoicing, you generate the invoices immediately, even if you decide not to e-mail or print the invoices using the Output wizard. Because this means that the creation of the invoices has been recorded for the contacts/participants, these lines are from then on longer displayed in the Invoice automatically function. In that case, you can only e-mail or print the invoices from the Invoice view.
- Click on: OK.
You now see all lines that still have to be invoiced.
- Select the lines for which you want to generate an invoice. Using the Ctrl+A hotkey, you can select all lines displayed in one go. You can undo this with the Ctrl+D hotkey.
- Click on: Finish.
If you do not send the invoices now, you can do so later on using the Output action in the Invoices view.
If you have selected the check box for e-mailing or printing the invoices using the Output wizard, the wizard now starts. If you start the Output wizard via automatic invoicing, you cannot select invoices.
To e-mail/print:
- Select the Different issue check box if you want to e-mail or print all lines in the same way and therefore do not want to take into account the Preferred issue method set for the sales/purchase contacts.
- Select the deviating issue method which will be the same for all selected lines, namely: Print, Print and e-mail PDF or E-mail PDF. For invoices, you also have the E-mail e-invoice + PDF option.
- Select a deviating report (other than that set in the sales and/or purchase contact profile).
- Select a message template if you selected one of the e-mail options as a deviating supply type.
- Select the Save in client record check box if you want to store the issued reports in the dossier for the contact(s).
- For Sorting, select the sorting method for printing.
- Select the Descending check box to sort the reports from high to low.
- Click on: Next. If you are using the queue, this step is not available and you cannot display a print preview.
You now see an overview of the lines that will be issued and how this will be done.
- Select a line with the Print issue method and click on the Print preview action to check the report.
- Select a line with the E-mail issue method and click on the E-mail preview action.
- Close the preview.
- Click on: Finish.
- Click on: OK when the message informing you that the processing is complete is displayed.
The Printed, Dossier, Mailed, Compl. proc. and Provided using eVerbinding check boxes are selected when you have completed the corresponding procedure. These fields are only visible if you have added them to the view.
Surcharge lines
If at least one line is present on which the Percentage factuurtoeslag field has been completed and if the ‘Invoice surcharge work type' field has been completed, Profit generates an extra line when generating an automatic project invoice. If multiple surcharge lines with different VAT rate groups are present, Profit generates a separate surcharge line for every VAT rate group. These lines have the 5 = Overhead/toeslag line type.
You cannot use surcharge lines if you are invoicing on the basis of drafts.