

Import multiple images for articles
You can import multiple images for an article. You can display these, for example, on your website.
You can import images with various file types, such as JPG, BMP, GIF, PNG and TIF. AFAS recommends using the JPEG format. This format takes up little storage space. Images are saved as .jpg or .gif files in Profit. When importing, the image is saved in its regular size and in a small size (thumbnail).
To import multiple images for articles:
In this example you import multiple images for articles.
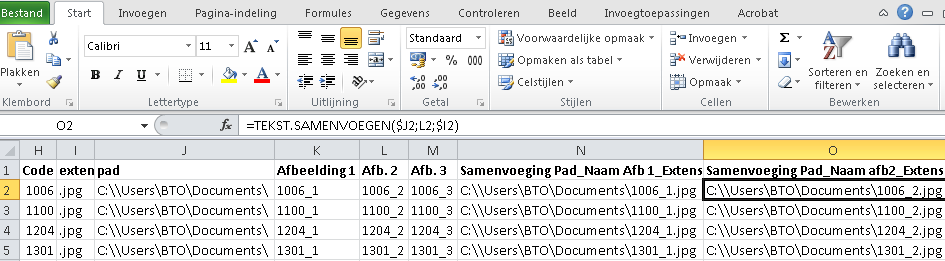
- Save all the images in one folder. If possible, ensure that the name of an image matches the code of the article, followed by the number. For example, specify 1006_1 as the name of the first image for Article 1006 and 1006_2 as the name for the second image, etc.
- Create an import file. Export the Artikelen view, for example, using the 'Export data to Excel' function. Save this export as a .csv file.
- In the import file, add the field with the location (the path) of the files.
- Add a field with the extension.
- Merge the name of the image with the file location and the extension. You can use the following formula to achieve this:
=CONCATENATE(A3;B3;C3)
Note:
In AFAS Online, the name of the path has a different format.
- Go to: Start menu / Order Management / Management / Import item / Article.
- Follow the regular procedure until you get to the fields.
- Link the mandatory fields (at least Item code).
- Drag the fields from the import file (containing the paths to the images) to the Locatie met pad afbeelding 1 field and the subsequent fields in Profit.
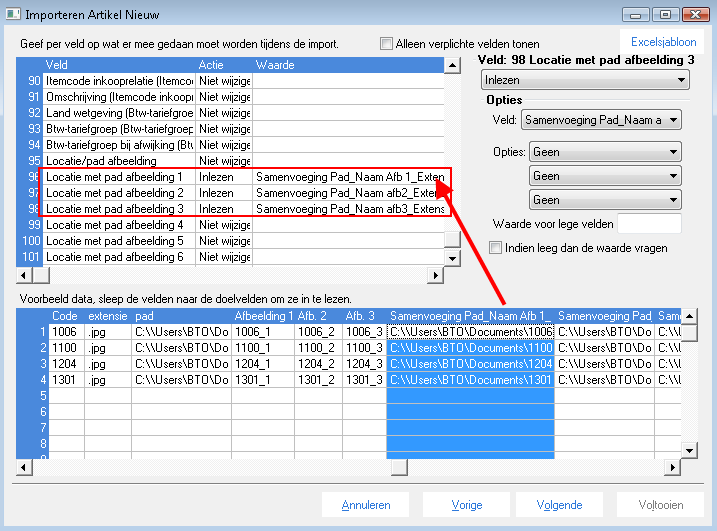
- Complete the wizard.
- You can view the images on the Additional images tab in the properties of the article.
See also:
|
Directly to |